


Materials
For the lumber on this one I was able to pick up a scrap piece of untreated 4×4 in a bargain bin at my local Menard’s. The board was a little dinged up, but as I needed to trim it down to a 3×3 cube it worked out really well.
- (1) 3″ x 4″ x 6′ Pine Board trimmed down to 3″x3″x3″
Milling & Assembly
 |
It all starts with a block of wood. To get started I cut a scrap piece of 4×4 wood down to a 3×3 cube. If you make this take you’re time you’ll want to get this as close to true as possible. |
 |
After you have your block the first step is to find the true center of one side. This is easy enough by just drawing an X across the surface. Again if you make this you’ll want to really make sure this is on the mark. |
 |
Next up I used a 2″ Forstner bit and setup a stop block on my drill press. I only drilled into the piece about a 1/4″. This is done so that you can determine what the depth will eventually be. I set the speed on my drill press to the slowest speed it could go. |
 |
After the initial drill take a ruler and line it up with the edge of two lines left from your initial X. This line will determine the depth of your drill press into the work piece. You’ll want to set your drill press for a little less than the length. I set mine at about 1/8″ shy of the length. At this point you’ll also want to mark a small x in 1 corner of each side. This is done as a guide for when you’re at the drill press to drill in a consistent manner on each side. |
 |
With your drill depth set, the next step is to drill into each side of the cube. You’ll actually start to see the cube inside after a couple passes. |
 |
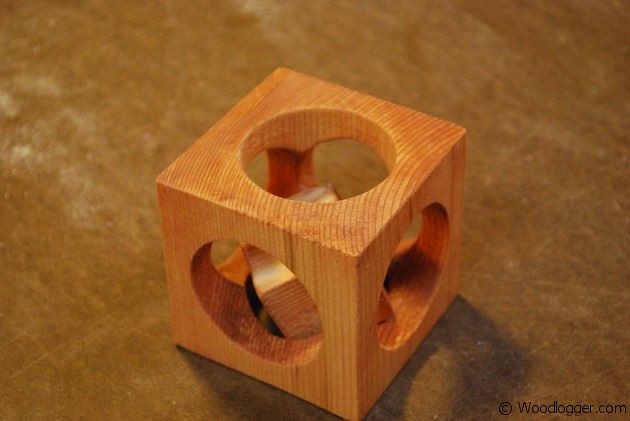
After you have drilled into all six sides of your cube you’ll see the cube inside the cube. It will still be attached to each of the corners of the inside cube. |
 |
With a sharp chisel lightly tap away each corner from the cube. You’ll hear it snap or click as you do each side. |
Finishing
