


Materials
For the lumber on this I was lucky and had some scrap hardwood that I was able to use. For the rest of the project I was able to build this with only one board. I made mine out of pine. For the front of the project I picked up some plexi-glass from a hobby store and cut it down to size using my table saw.
- (1) 1″ x 3″ x 8′ Board (you might be able to squeak this out with a 6′ board, but it’ll be close)
- (1) 1/4″ x 1′ x 1′ piece of hardwood (will cut down to less than 1 foot)
- (1) 1/8″ x 7″ x 8″ plexi-glass
Milling & Assembly
 |
After cutting all of my boards according to the plan. I cut a slot on each end board to allow the battery to come out easily. For mine I used a 2″ forstner bit on my drill press. It worked pretty well, but you could certainly used a band saw, scroll saw, etc. to get this done. |
 |
Next was the glue up. For this I made sure that I had my back and bottom already cut. I used the back as a guide to line up my battery slots. However, since I didn’t want any glue to make its way to the back board I covered it with wax paper. |
 |
I worked my way through each board by gluing and then shooting brad nails into the bottom. I could have used screws for this, but since all board stock was only 1/2″ I decided brads were the way to go. |
 |
After gluing and putting in brads on the bottom shelf, I then clamped up the rest of the dividers until the glue set up. |
 |
After everything was glued up, I attached the front of the organizer with a clear plexiglass that I cut to size on my table saw. Before inserting the screws I pre-drilled all of my holes using a 7/64″ drill bit. I used #6 – 1/2″ screws to secure the front. The plan originally called for #8 screws, but my plexiglass was cracking a little too much and I decided to go with #6. |
 |
After attaching the front I then attached the back by using glue and brads. Attaching the brads was easier as I had pre-marked where the battery dividers were on the back of the backer board. |
 |
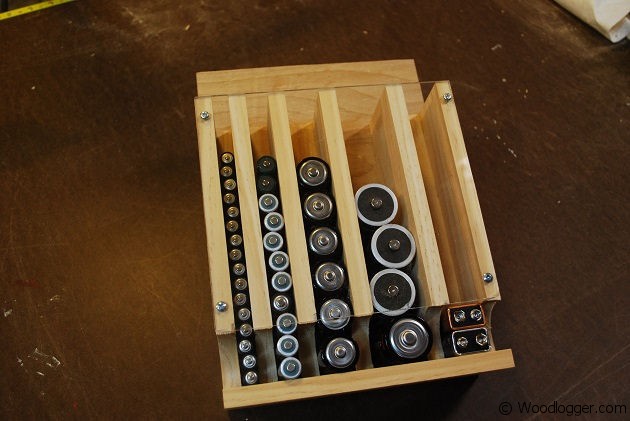
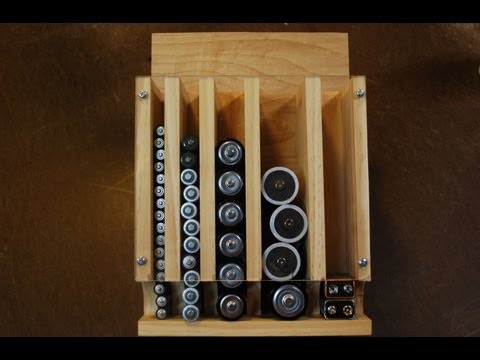
Here it is. The completed project. This really is a pretty easy one. You can build this in a few hours. I completed mine by drilling holes in the top of the back board and hung it on a peg board in my garage. |
Finishing
Not a lot to finishing this (this one is going in the garage folks). In fact I chose to just sand lightly the sides and back, and not apply any finish.