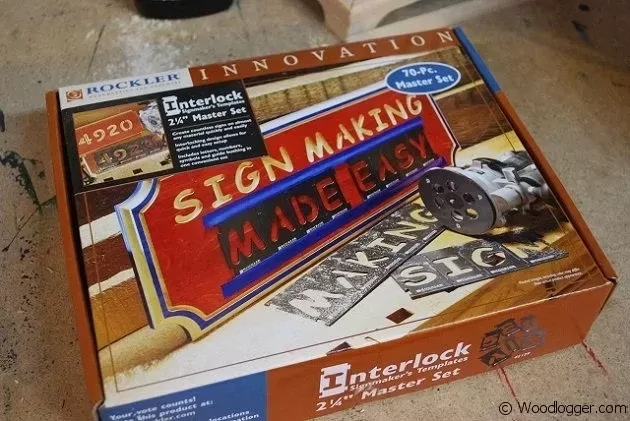
 I purchased a sign maker kit this past summer and was really excited to give it a try. After about four or five tries at getting everything setup (and feeling really stupid that I couldn’t get this dialed in); I threw up my hands and put it away. Alas, I did feel a little vindicated when I talked with someone else later who also had a lot of problems with theirs too. Misery loves company I guess. Now fast forward about 6 months and I see for sale an even easier looking sign maker kit. I purchased the Interlock Signmaker”s Letter Kit by Rockler. I’ve purchased other stuff from Rockler that turned out great, so I thought I would give it a shot. What a delight this kit has been so far. Unlike the other sign kit(which I won’t name, but can be bought in a lot of big box hardware stores) this one truly makes it as easy as it looks. Please check out my review below and be sure to let me know how you like yours. As always I will put links to some of the things I used at the end of the post. Also check out “my attempt” at putting a video together on how I used this.
Features
- You can buy the kit in either 2 1/2″ or 4″ sizes
- The letters kit includes: A, A, B, C, D, E, E, F, G, H, I, I, J, K, L, L, M, M, N, N, O, O, P, P, Q, R, R, S, S, T, T, U, V, W, X, Y, Z, ‘, and three spacers
- The numbers kit includes: ?, 1, 1, 2, 2, 3, 3, 4, 4, 5, 5, 6, 6, 7, 7, 8, 8, 9, 9, 0, 0, !, @, #, $, ‘, ?, ., / and ‘
- Uses a standard plunge router
- Letters interlock with tabs on each letter template
Criticisms
I think my only criticism of this kit is that the included guide bushing is made out of plastic. Now it may be an okay guide for many, but in my previous experiences with plastic guides is that the bit gets so hot that it actually starts to melt or get’s soft that it doesn’t do well in a template. I decided to just buy a brass guide and use it instead. Not a big deal, and I did notice that in the new Rockler Interlock Signmaker”s Templates – State Park Font Kit, 2-1/4”” font kit it does include a brass guide. I’m guessing Rockler must have heard enough feedback about the plastic one.
The Test
  | To try out my kit I decided to make a sign of my website for my workshop. Sounds simple enough just a website name with a .com added to the of it. The first thing I needed to do was attach my router bit and the guide bushing to my router. I used a router bit that I picked up from Rockler. It was the 3/8” Signmaking Carbide Router Bit, with a 1/4” Shank. For the guide bushing I picked up the Signmaking Brass Bushing – 3/8” ID, 1/2′”. These weren’t too expensive and worked really well when I made the sign.If you’ve never used a guide bushing before it simply attaches to the bottom of your router’s guide plate. The plate has an indentation that allows the guide to fit in just perfect. I’m not sure if all plates are made compatible, but it worked well with my craftsman router. If you have a router plate with this, I believe you can purchase universal plates that might work. |
| The kit comes with all the letters, numbers and symbols that you would expect as well as spacers. When I laid the letters for my sign I had to use the letter O 4x. The kit only comes with 2 O’s. I had to partially tape up and route my sign. This really was easy as I just kept the alignment set with the other letters that were already taped down. On the letter M I did have to spend a little extra time ensuring that I had it fully routed out. |   |
  | After I had the letters in my sign all routed out. I cut the length of my board on my table saw to a final length. Then I used a round over bit on the edges of my board. There are really a lot of options that you can do to your board that this point. I decided to just do a simple round over. |
| When it came to finishing the board; I first sanded the entire board front and back. I didn’t sand into the groove of the letters. Not sure if that is a “best practice” or not, but it seemed to absorb the finish I did after the sanding. After sanding I decided to use a method that I came across on the internet. I first applied a thin layer of lacquer across the entire surface of the board. After it dried I went and painted my letters with a black enamel paint. In a previous project I then applied another thin layer of lacquer on top of the paint. I chose not to do the second layer as I plan on keeping this sign inside. |    |
In Conclusion
My overall review is that I really like this sign making kit! I would definitely recommend it to anyone who is looking to make wood signs. I would recommend that you purchase a brass guide bushing & bit at the same time as you’ll want to play with this as soon as you can. I was able to make my first sign in about an hour. The second sign I made was done in about 20 minutes. You’ll be amazed at how easy and fun this kit can be.
referring to the sign maker’s template bushing, I am unable to do a sign without blowing out two or three brass bushings. not enough clearance between the bit. john