Wooden Door Mat – Floor Mat
I’ve seen various versions of wooden floor mat’s online now for a while. Just Google Wooden Door Mat or Wooden Floor Mat and you’ll see plenty of them. I settled on a version of one that would work well for me; where of all places do you ask? Lowe’s. Yep. Apparently Lowe’s actually has quite a list of free plans that are available to download for free. Below I’ll include direct links to their free plan site.
If you make one of these be sure to post a picture of it over on the WoodLogger Facebook Page. I’d love to see how yours turns out.
Milling & Assembly
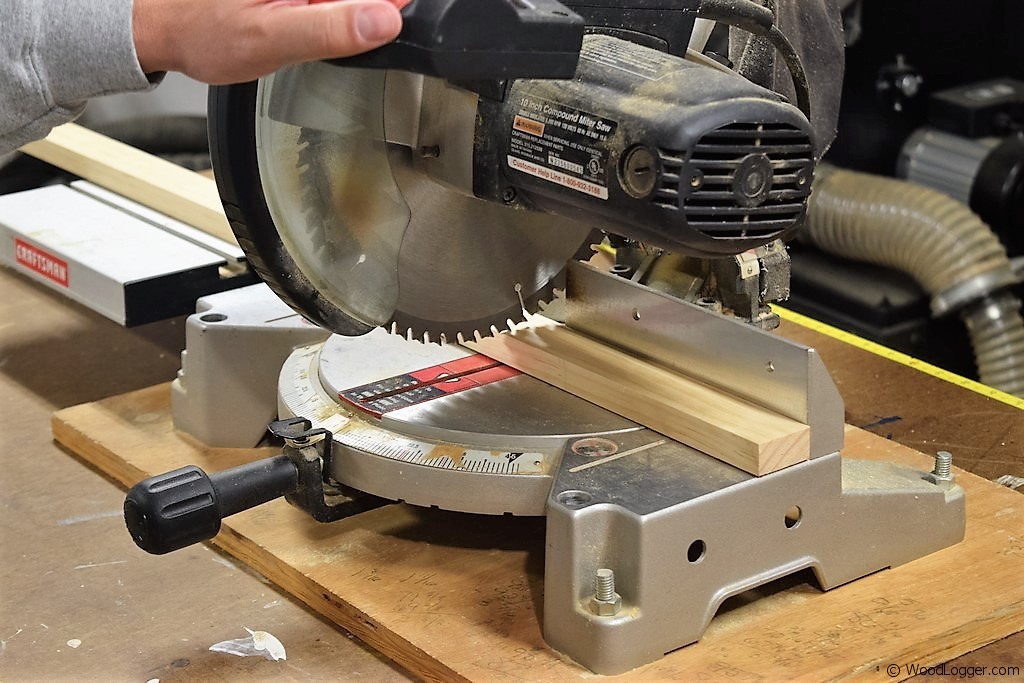 | To get started on building the wood mat. I cut 38 blocks(actually, I cut 40 as I wanted a couple of extras just in case). I cut these to a length of 9 inches. Fortunately for me the length of my out-feed table is precisely 9 inches. This made cutting consistently an easy task. You can always do a simple stop block on your table if needed. |
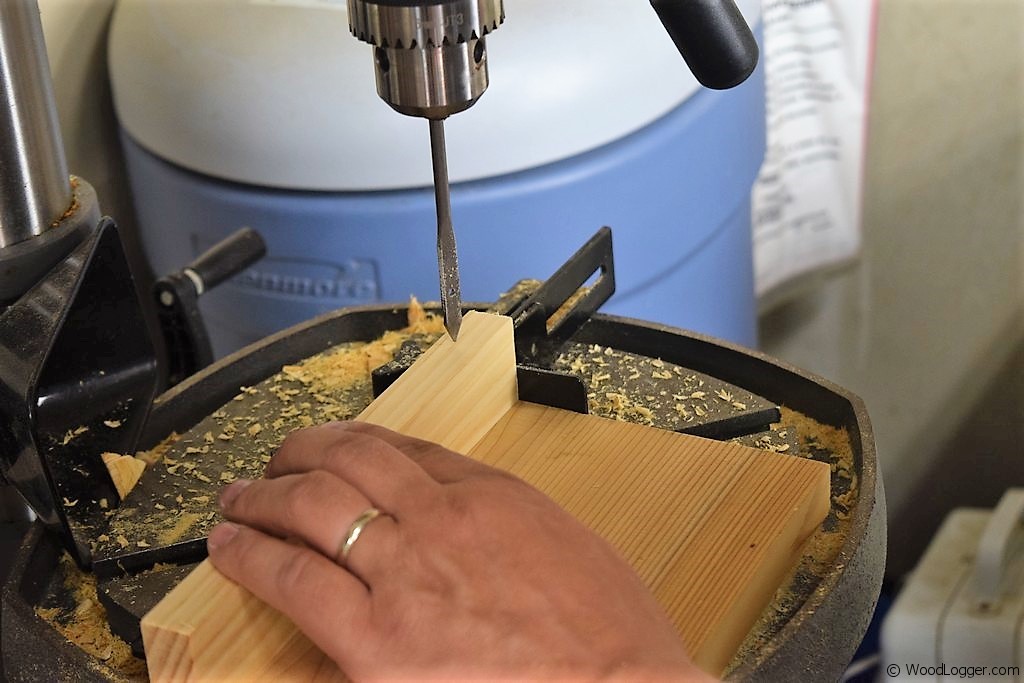 | Next up, I drilled into the ends (1-1/8″ inset on each end) of each block using a 5/16″ spade bit. Spade bits do a slightly better job than a regular drill bit, but if that’s all you have it’ll work fine. |
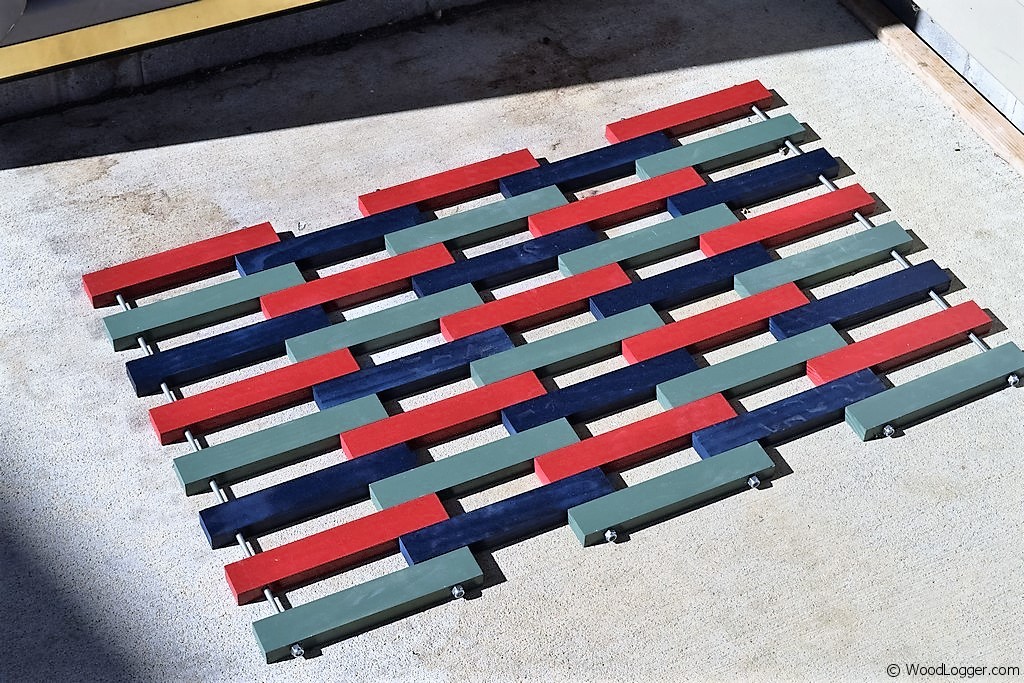
  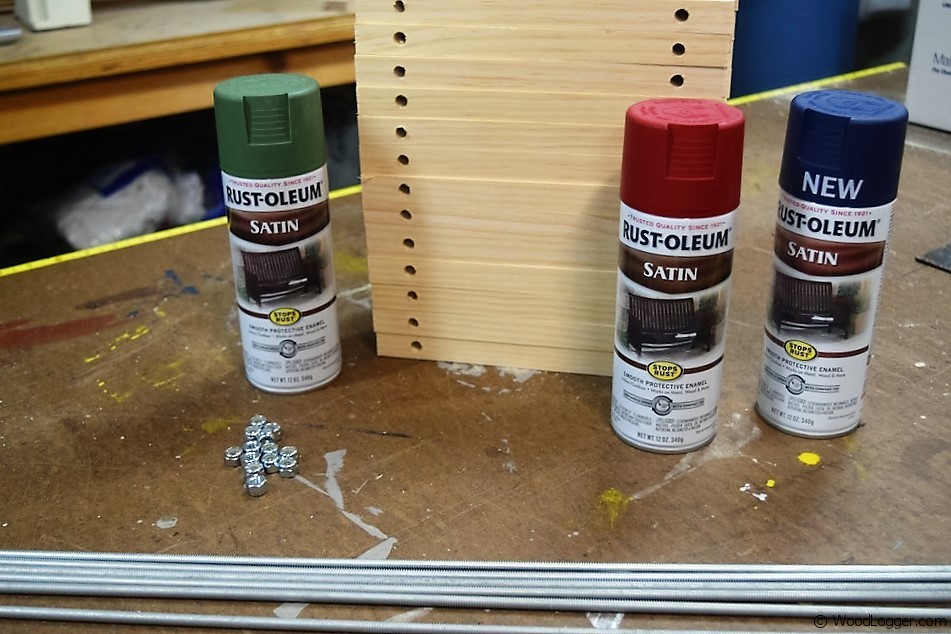 | Before doing the final assembly I did a few things first. First I did a quick dry run of assembly. I made sure all of my stop nuts worked on one end of the metal rod. Next up, I inserted a few of the blocks onto the rods to give myself an idea of how this would ultimately look. Lastly, I painted all of the block using an enamel based paint. I chose a simple three color pattern. |
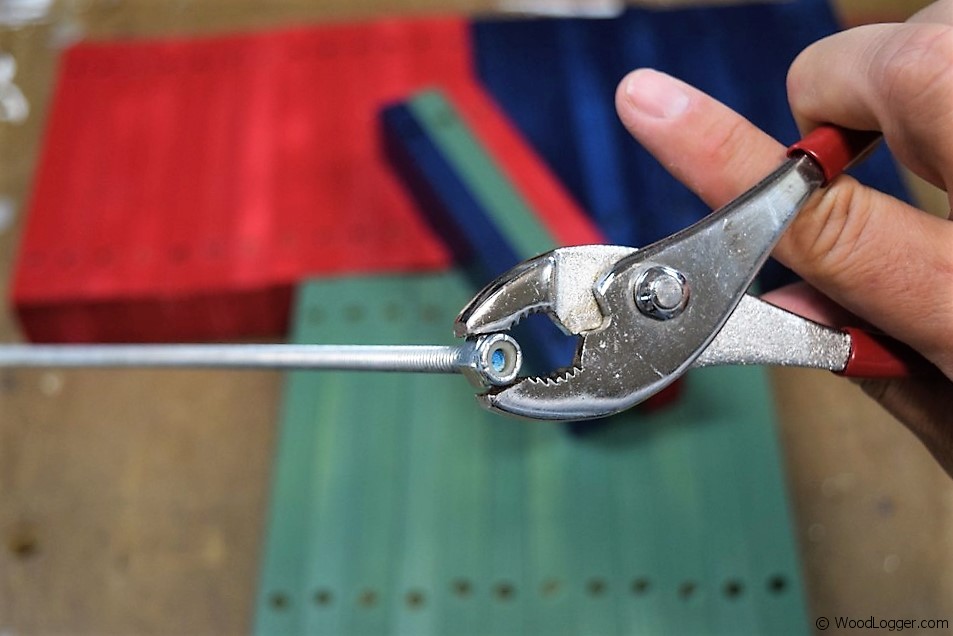 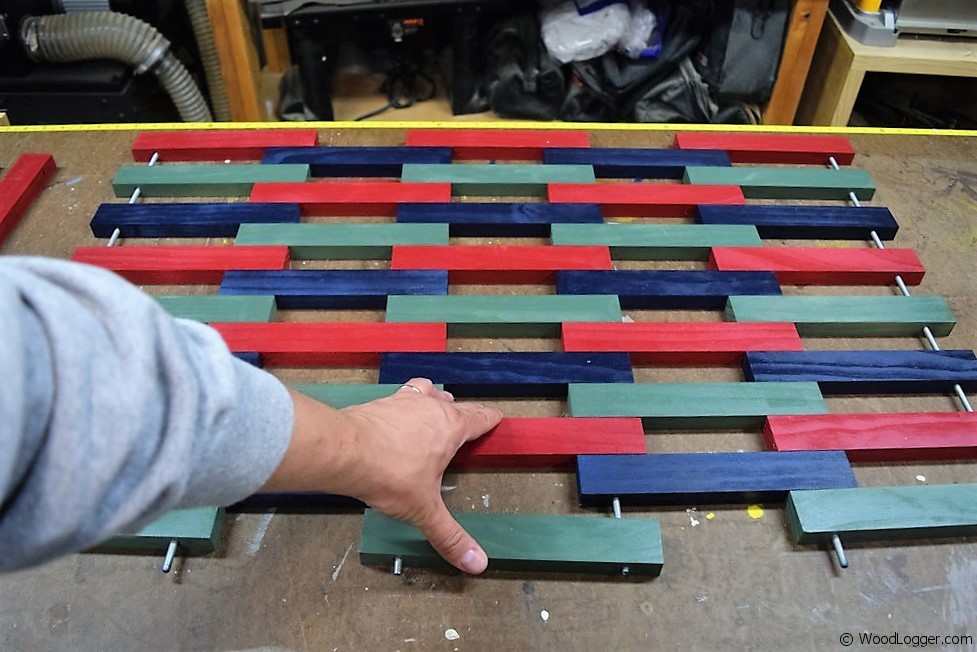 | After I had all of my wood blocks painted I moved onto the final assembly. I placed a stop nut on each end of the metal rods, and then did a simple pattern of alternating colors for my wooden mat. |
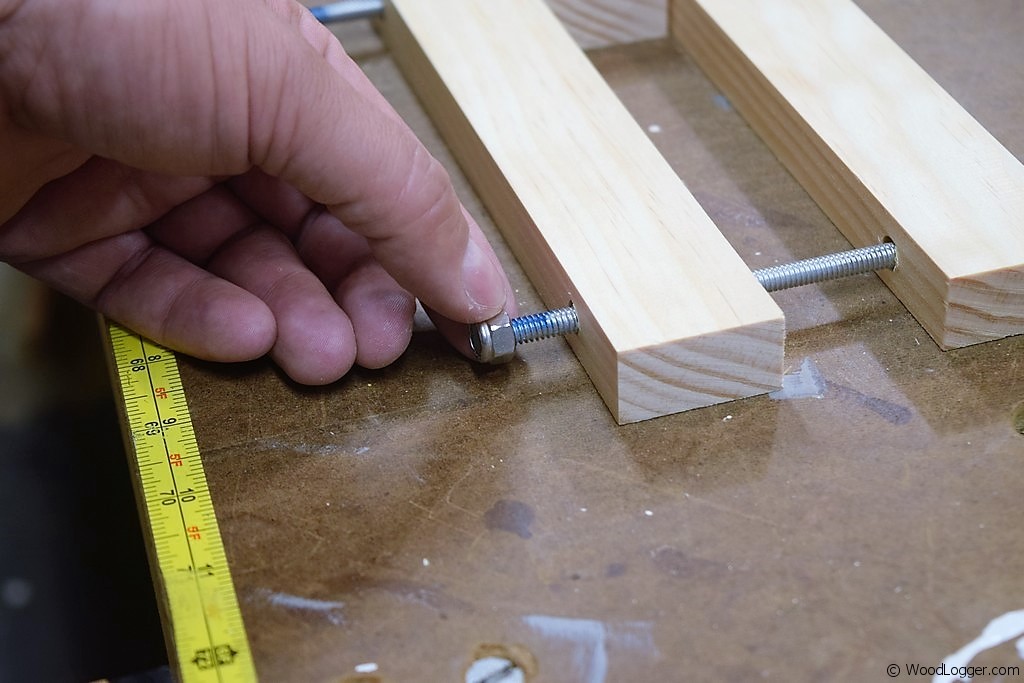
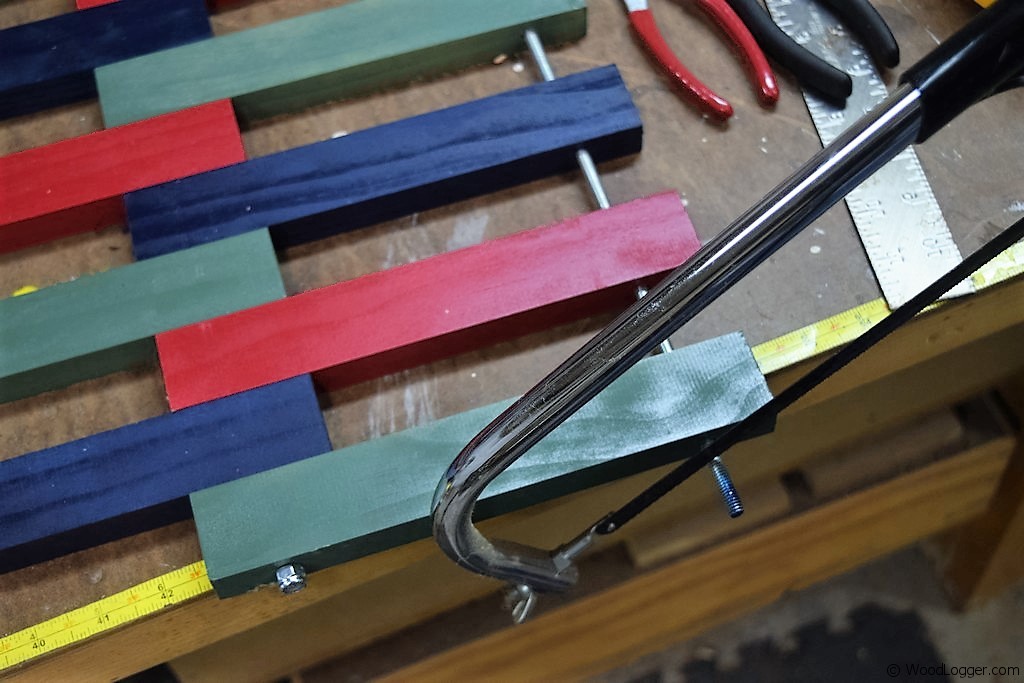  | To finish off the ends of the rods you’ll need to remove any extra metal rod. Leaving enough space to place another stop nut on the end. You can use a simple hack saw, or if you have a dremel it works nicely too. |
Items Used to Finish this
Wow what great process you shared here to create a wooden floor mat, but before putting the whole thing jointly you should decide whether or not you want to paint your mat. If that’s the case, first apply a coat or primer and let it dry. Sand smoothen the pieces and then apply two coats of paint.