How to Make Wood Crates
 Wood crates are a unique and practical storage solution. When I see a crate, I immediately think of all the items I could store in it. It’s interesting to note that, not too long ago, wooden crates were commonly used for shipping, yet today many people pay good money for them, viewing them as retro decor.
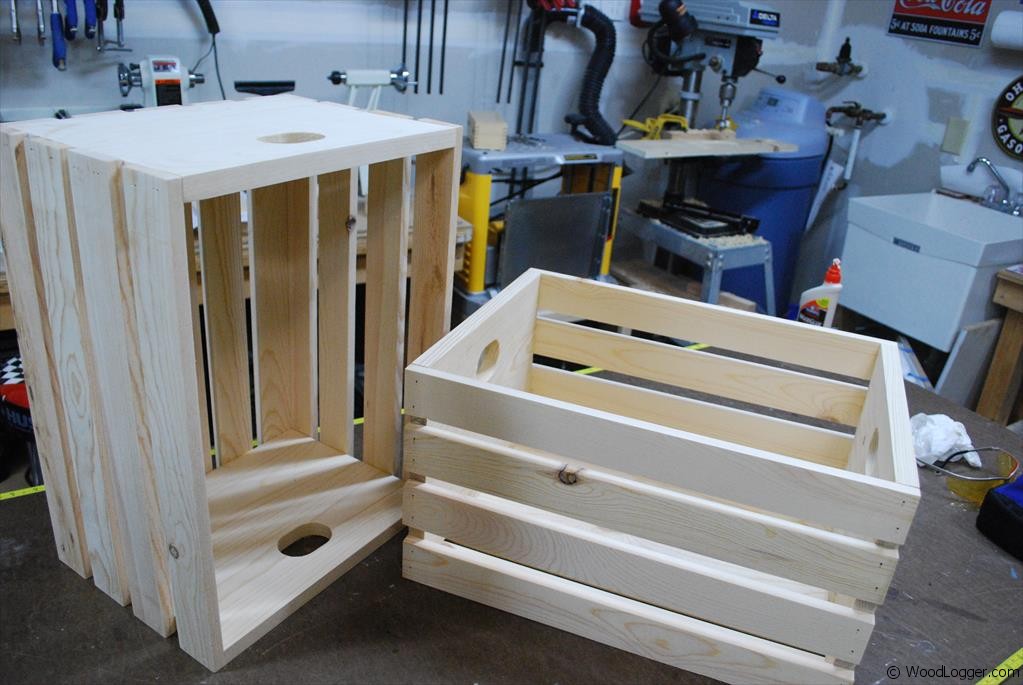
In this guide on how to make wood crates, I share my experience creating one intended to serve as a coffee table. I loved the look of the crate so much that I decided to split this project into two posts. I used pine wood for my crate, which is very affordable, making it an ideal choice for budget-conscious DIYers.
I took extra time to mill my boards with a sizer planer, but you can easily craft this crate using scrap wood or pallet wood. Depending on your intended use, a more “beat-up” appearance may even enhance its appeal. The entire crate is assembled using just wood glue and brad nails, making it a straightforward project for anyone looking to learn how to make wood crates. Whether for storage or decorative purposes, this DIY wood crate is a fun and rewarding project!
If you make one of these be sure to post it over on the Woodlogger Facebook Page. I’d love to see how yours turns out.
Cut List
- (4) 12-1/2″ x 4-3/4″ Sides edge glued together to make a final height of 9-1/2″
- (13) 18″ x *2- 1/4″ Slats (I used 1/2″ thick wood for my slats, but 3/4″ looks great too)
- *You may want to play around with the width of the slats depending on how much gap you want between each slat.
Milling & Assembly
 | First step was to work on my sides. To start I planed all of my boards(I had really crummy lumber). Then I trimmed my boards using my table saw to a width of 4-3/4″. After that I used my miter saw to cut a total of 4 boards at a length of 12 – 1/2″. I’ll need two boards for each side as I’ll edge glue them together to make each side. |
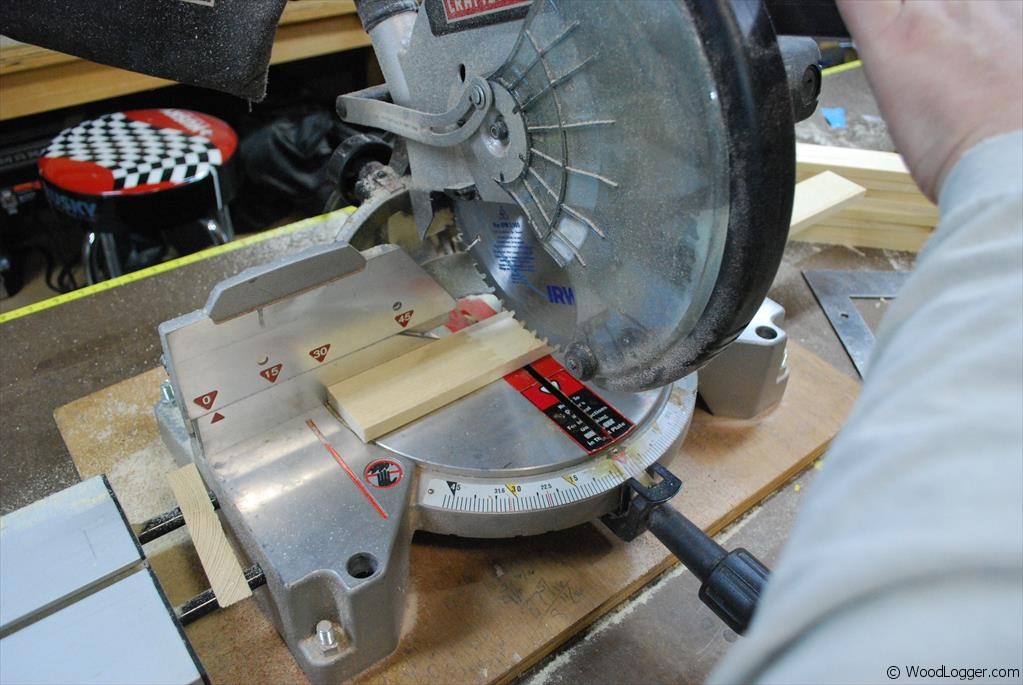 | Next up were the slats. It was a similar process as my sides. First I trimmed a board on my band saw to a width of 2-1/4″. Next up I cut 13 slats at a length of 18″. I’ll use 4 on each side and 5 on the bottom. You may want to play around with the width of the slats depending on how much gap you want between the slats. |
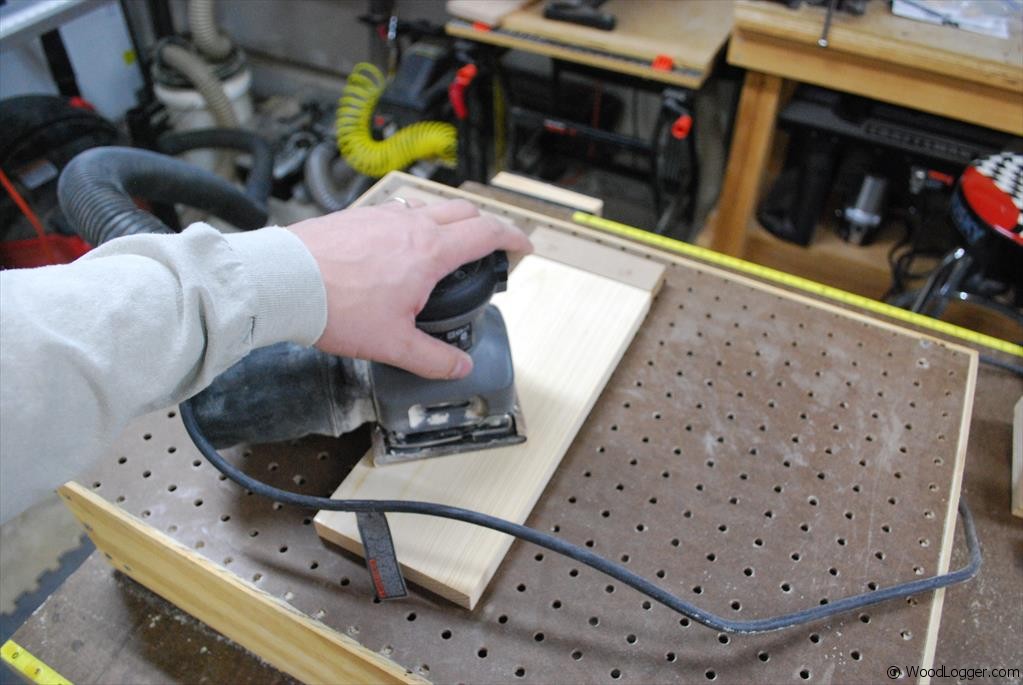 | I took a short-cut here and pre-sanded my boards after they were all cut. This makes it a little easier then trying to sand after the crate is finished. I used a standard 60, 100, 180 grit approach to my sanding. I also used my bench top downdraft table to help reduce the amount of sawdust kicked up. |
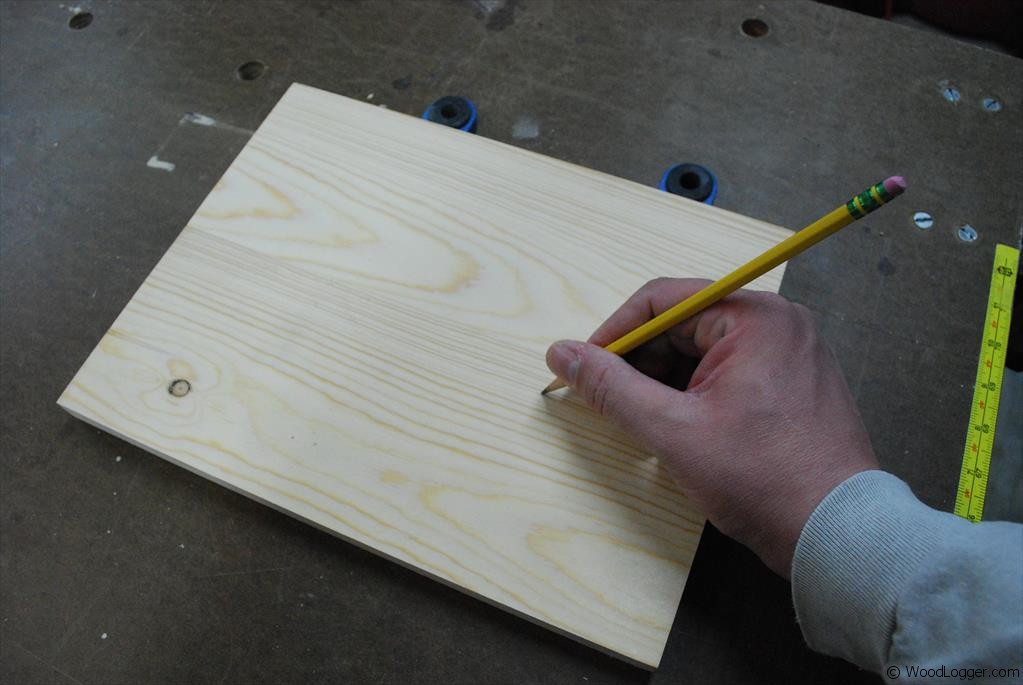 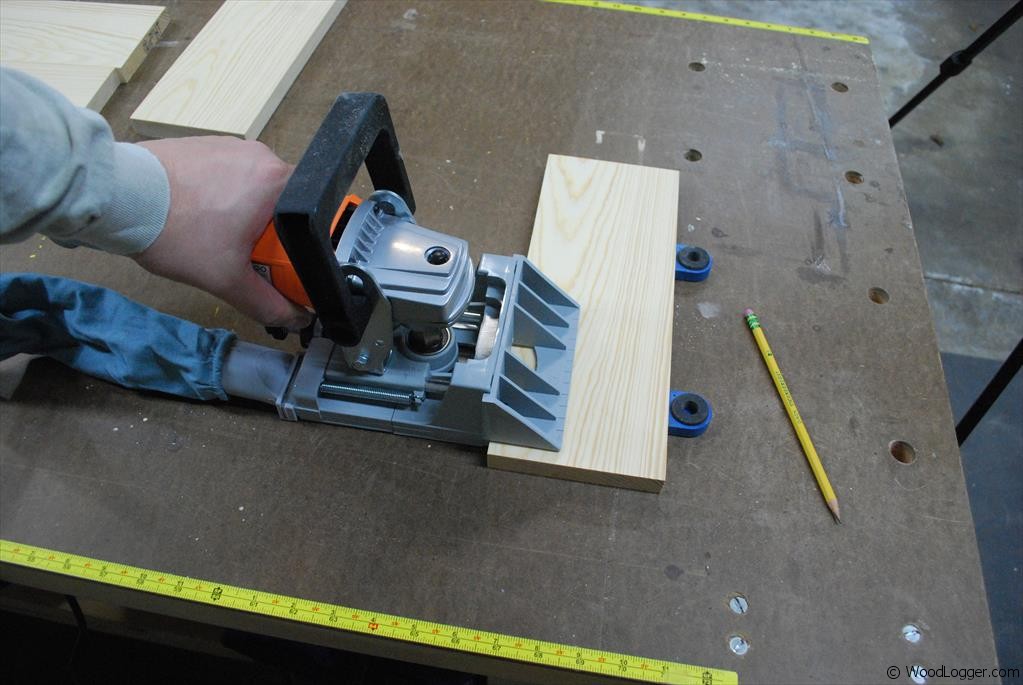 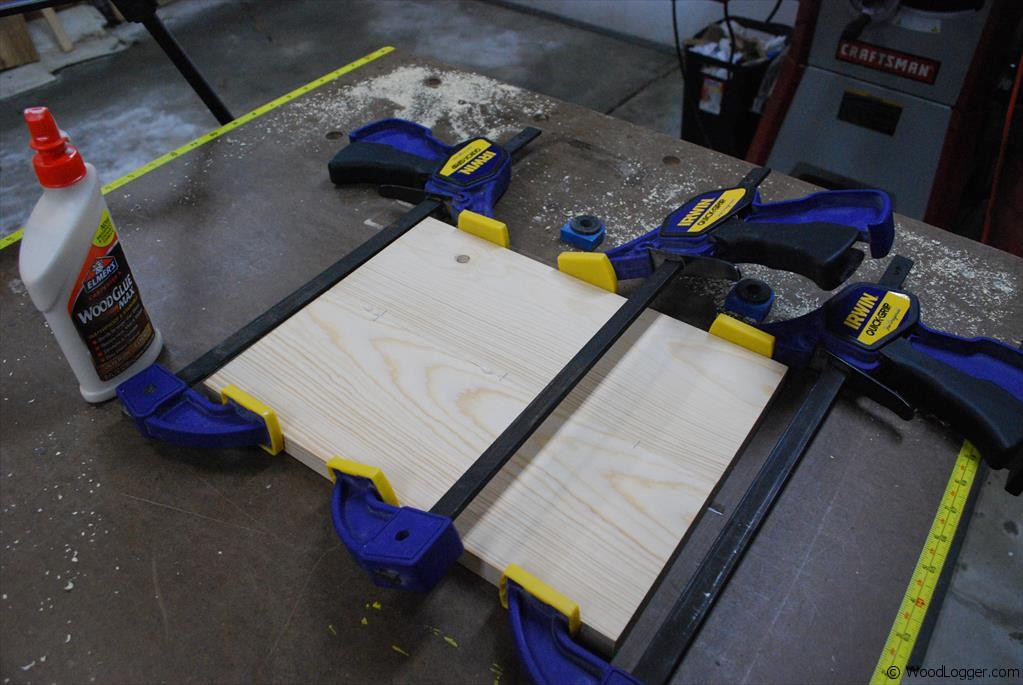 | For the sides of the crate I chose to edge glue two boards together. I could have used pocket holes, or dowels either of these would have been fine. I decided however, to use a biscuit joiner as I thought this would be the most suitable option for how I’m going to use it. To start I aligned my two boards and struck a few lines across both boards to know where to insert the biscuit. Next I used my tool to drill holes for the biscuits. After that I glued and clamped everything up till it was dry. |
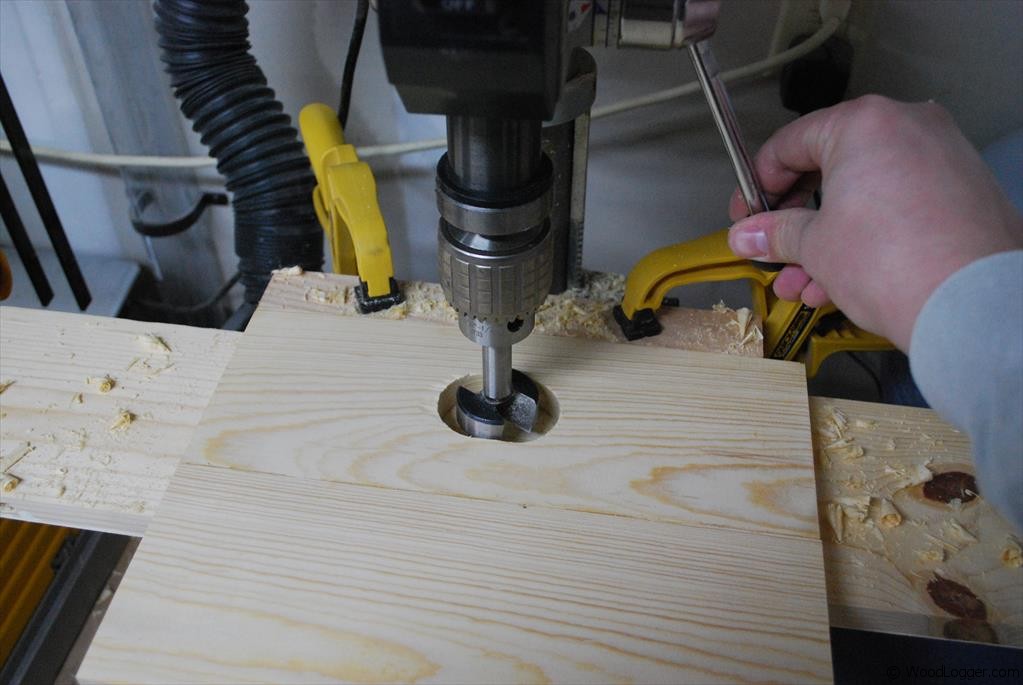 | This is an optional step, but I wanted small handles on the sides of my crates. I really wanted the look more than the function. I used a 1 – 3/4″ forstner bit and then slid my board over about 1″ and drilled another hole. It gave a nice rounded look(and was quicker then using a jig saw). |
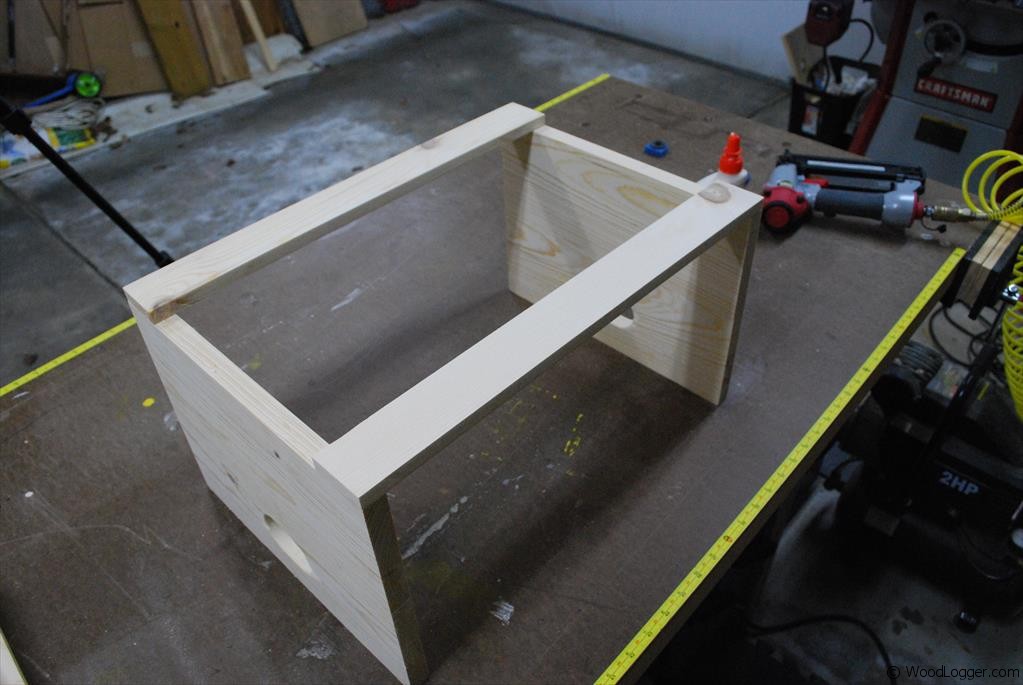 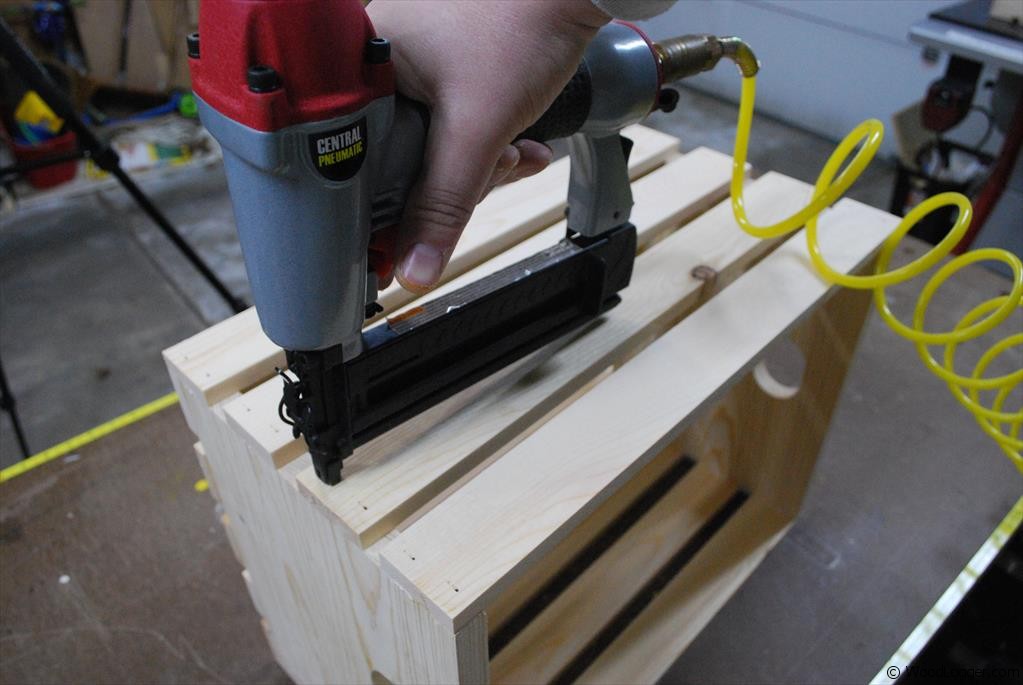 | To finish up my crates, there are again a lot of options here. Nails, screws, or even just glue. For mine I decided to attach all of the slats using glue and 1″ brad nails. I used 5 slats evenly spaced across the bottom of the crate and then 4 slats on each side. |
Is there a PDF file or printable version of this?
No pdf version, but you can click on the + button near the top of the article and there is an option to print
How big are your gaps between wood pieces?
Sorry Duff, I can’t remember the exact measurement, but I think there was about 1/2″ gap between each slat. I evenly spaced them based on the number of slats I used.
The measurements don’t add up. Please help to clarify. If your side panels were 9.5 inch tall, then the total height of the crate is 10″ tall with the extra 1/2″ from the bottom slats you put on. However you state that your slats for the sides were 2.5″ each, and for on each side (as indicated and shown with your pictures) would be 10″ total, with NO gaps. But your photos indicate 3 gaps across 4 slats, and you claim to be 1/2″ each, meaning there would be 1.5″ of additional height I’m not finding.
I am not poking holes, I love your guide and would love to make the same crates, but the measurements just don’t make sense to me!
Hi Munjal, hmm I don’t have my crates any longer or I would go and double check my math. I suppose my slats may have been smaller and I had a typo or misspoke. Hopefully this doesn’t cause to much confusion. Good Luck on your crates.
End pieces are 9″x11.5″x3/4″. Side pieces are 18″x2″x1/2″ with a 1/2″ gap inbetween… if your still interested in making them.
What is the tool that you use to make the slots for the biscuits?