Table Top
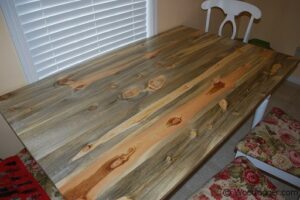 If you’re looking for a rustic or antique feel for a kitchen; you might be really surprised what you can do for just $35 and a few hours of your time. I completed this table top on a Saturday afternoon recently for my wife. She wanted to keep our existing table and chairs, but was looking to replace the table top with a new look. Needless to say I didn’t quite “get it” at first. So I insisted she pick out the lumber and show me some examples of antique rustic. The woodworker in me says always use the best lumber and make everything as close to heirloom as possible. For this project we kept the base of the table and simply removed the top. I did make the table top slightly wider then our previous table top. The overall dimensions were 38″ x 60″. For the joinery I used pocket holes, and no glue. We chose off the shelf lumber from a local big box store. My wife insisted on picking boards with lots of knots and discoloring. I almost lost it, but as she said it “gave it character”. I have to admit even after completing this I simply didn’t get it. What has happened since is the darn thing has just really grown on me. It does have character! It doesn’t look like anything else in our house and it’s something I notice (and yes in a good way) every time I am in our kitchen. The bottom line is always trust your wife.
As always I will put links to some of the things I used at the end of post.
Materials
For the lumber on this one I was able to pick up pine boards from our local Menard’s. The lumber we chose had a lot of character. I tried to pick the straightest boards there and I was able to get away without any planing.
- (7) 1″ x 6″ x 6′ Pine Board
Milling & Assembly
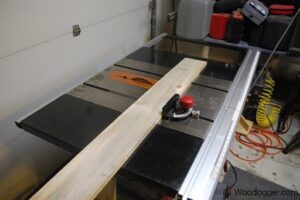 | For the rough cuts on this project I did standard cross cuts on the table saw. I got lucky with my boards all being straight enough that I didn’t need to plain any of the boards. For my table I cut the boards to a rough cut length of 62″. |
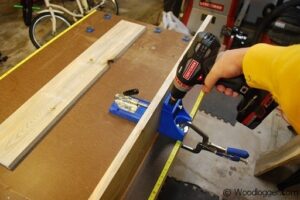 | For the joinery on the table I decided to use pocket holes to edge join the boards together. I used my Kreg Pocket Hole Jig to drill pocket holes about every 8″ on my boards. If you haven’t ever used one of these it really is one of my favorite tools. Click this link to see more about it. |
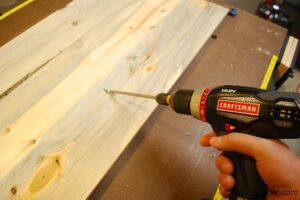 | After I had all of my pocket holes drilled in my boards, I joined them using 1-1/4″ pocket hole screws. I didn’t use any glue for this project. |
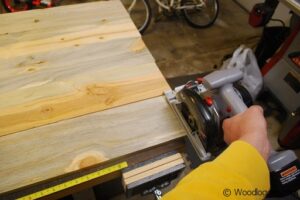 | After all of the boards were edge joined I went back and finish cut the table to its final length. For the cut I used a circular saw with a very fine blade installed in it. To keep the cut straight I used a simple edge guard that was held down with clamps(not pictured). I was really surprised how well this worked. |
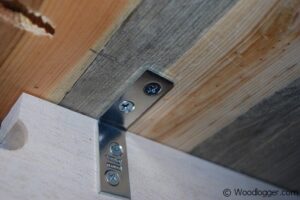 | After the table was cut to its final length I simply used L brackets to hold the table to the existing frame of the old table. |
Finishing
To finish the table, I tried several different sanding techniques. All of them had a way of dulling the color and the character of the boards. My wife insisted NO sanding. So instead of doing typical low grit to high grit sanding, I very lightly sanded by hand with a high grit sandpaper. The finish I applied to this, was a product called Salad Bowl Finish. I’ve used this product in the past with success, but was a little apprehensive about using in on a kitchen table that will take a lot of abuse. I applied 6 coats to it and it seems to be holding up pretty well. Here is my disclaimer on this one though. This whole approach to finishing was a new one for me folks, my attitude on this is we’ll see how it looks in 6 months. Worst case I wasted a couple of hours of time and $35.
Items used to complete this project
Some furniture at this age have a antique value. Some peoples are want to purchase those only for their hobby. So i think it is very important to us to purchase some good qualities furniture.
The table top looks great. How has it held up for you ? I mad a small hutch our of the same lumber (Denim Pine) it is holding up great but does not get the abuse the table would, and that is my next project.
So far so good. A few little dings and nips, but as my wife would say it just adds character… My thought when making this was that I’m only out a little time, and a few bucks if this doesn’t work out. Pocket Hole joints really hold up well.
pocket hole joints for a table top? ugh. there are better ways my friend . there are better ways.
Such as…? If you have a better idea, please share it to help us all, instead of just sniping…
Positive goes a long way my friend.
That wood is called beetle kill blue stained pine. It gets mixed in with the “good stuff” at your box store. It is actually very sought after and guaranteed dry as the tree is dead standing.
Pocket hole or biscuits? Building a table for first time. Wife can’t decide between super heavy farm table using 2x or going with 1x. I think pocket hole will have to be used with 2x but biscuits will be better with 1x. Any suggestions from those more experienced than I?
I used a plug cuter then drilled the holes. Screwed down the boards then put the pugs back in the holes and sanded the table top.