Weather Station
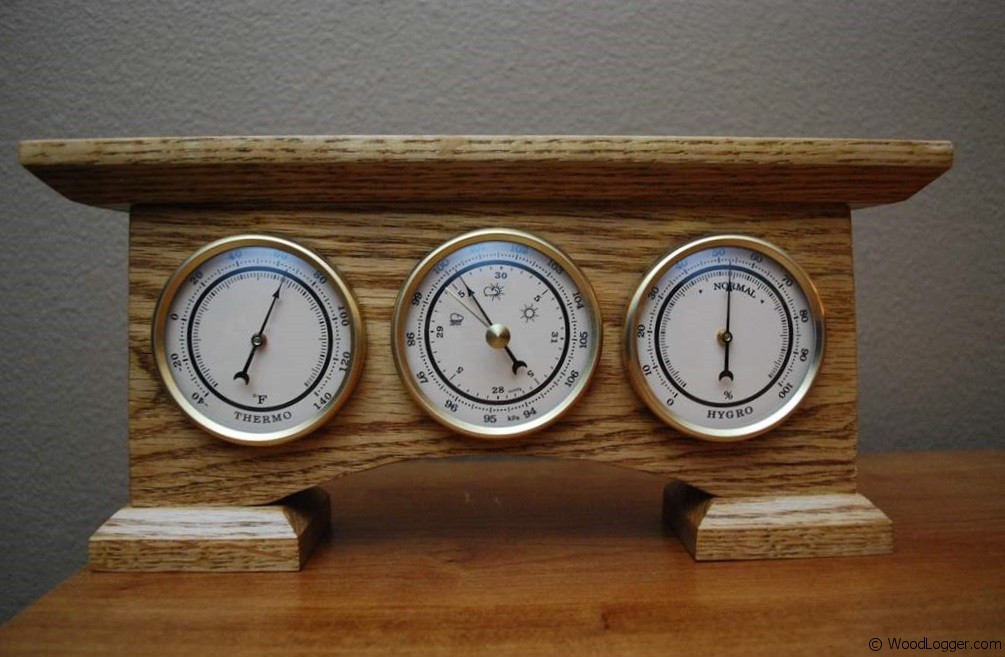 This home ambient weather station is a lot of fun and really easy to make. I’ve been wanting one of these for years, but I never realized that each of the gauges are available online. I always assumed I’d just buy one. Most of the weather stations I’ve seen are usually wall mounted. I really wanted one that would sit on a bookshelf or a desk. The weather station I made has a thermometer, hygrometer, and a barometer. I choose 3 elements, but there are other things you can choose from as well such as clocks etc. Also I think a nice 2 gauge display would have worked nicely as well. For weather forecasting though the barometer is probably the most important. I have a page posted on the site with tips for weather forecasting. It’ll give you basic information for using your barometer.
I was able to build this home weather station using just one board without any tricky glue ups or joinery work. I made mine out of Oak, and stained it with an Oak Finish and Semi Gloss Sealer. It has a great classic look and feel it, and should last for many years.
I put links at the bottom of this post where you can find some of the items I used to make this.
For a little extra help with this project I also put together a video of how I made this below.
Materials & Hardware
- (1) Thermometer Gauge
- (1) Hygrometer Gauge
- (1) Barometer Gauge
- (1) 1″ x 6″ x 4′ Board (I made mine out of oak)
Milling & Assembly
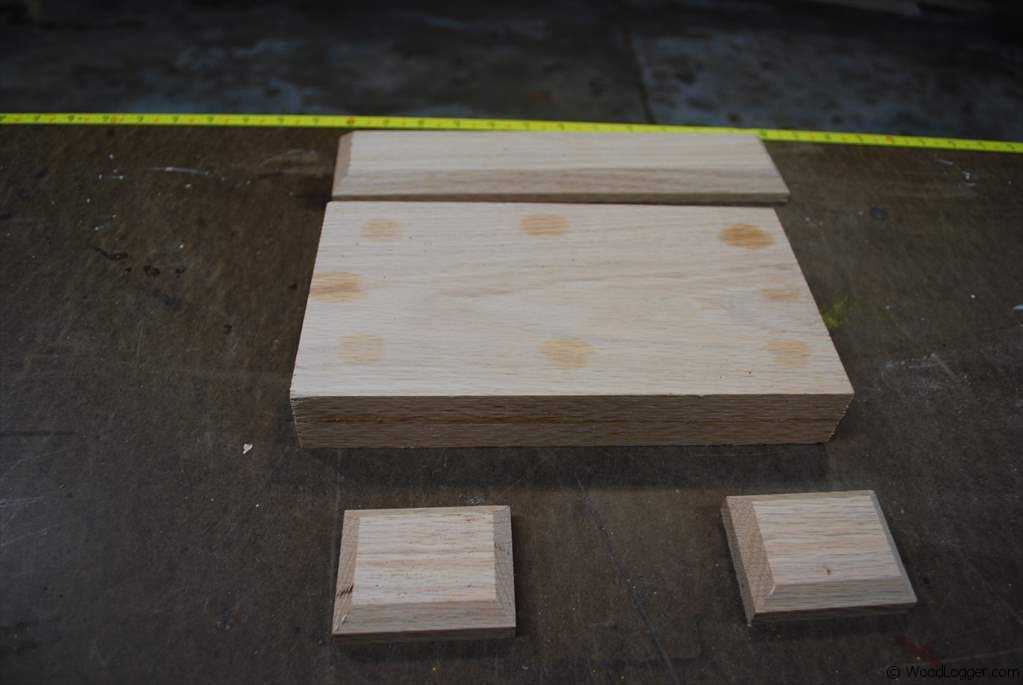
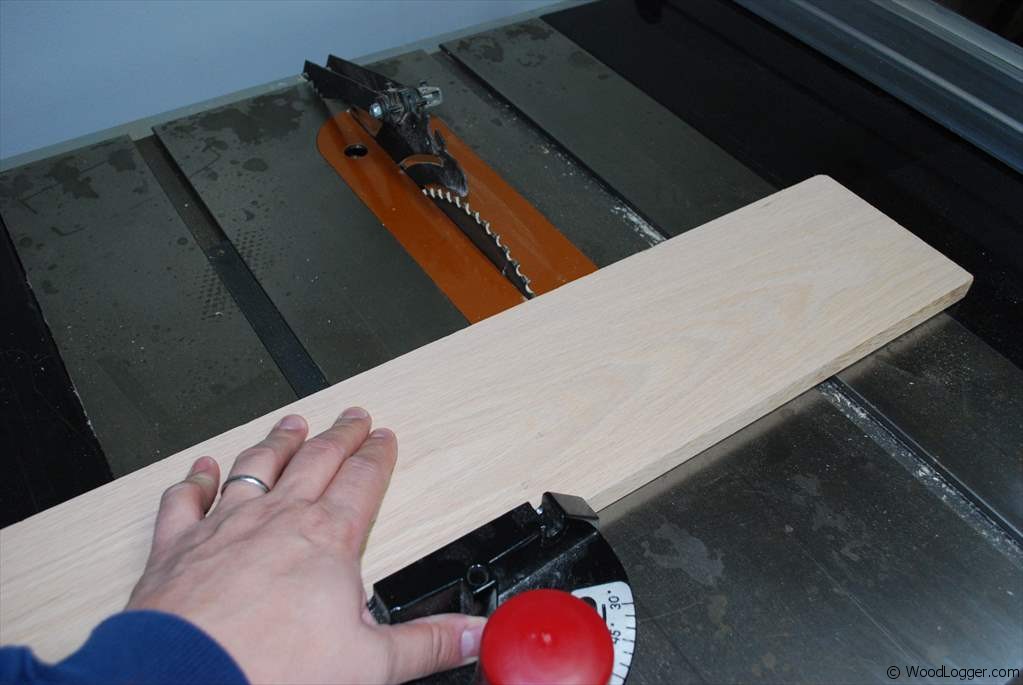 | When it came to the rough cuts on my weather station I cut 2 boards approximately 10″ long and 4″ wide. This made the center part where the weather gauges will be. For the top I cut another piece that was 12″ long and 2-1/2″ wide. For the pads that it sits on I cut 2 of those at 2″ x 2-1/2″. |
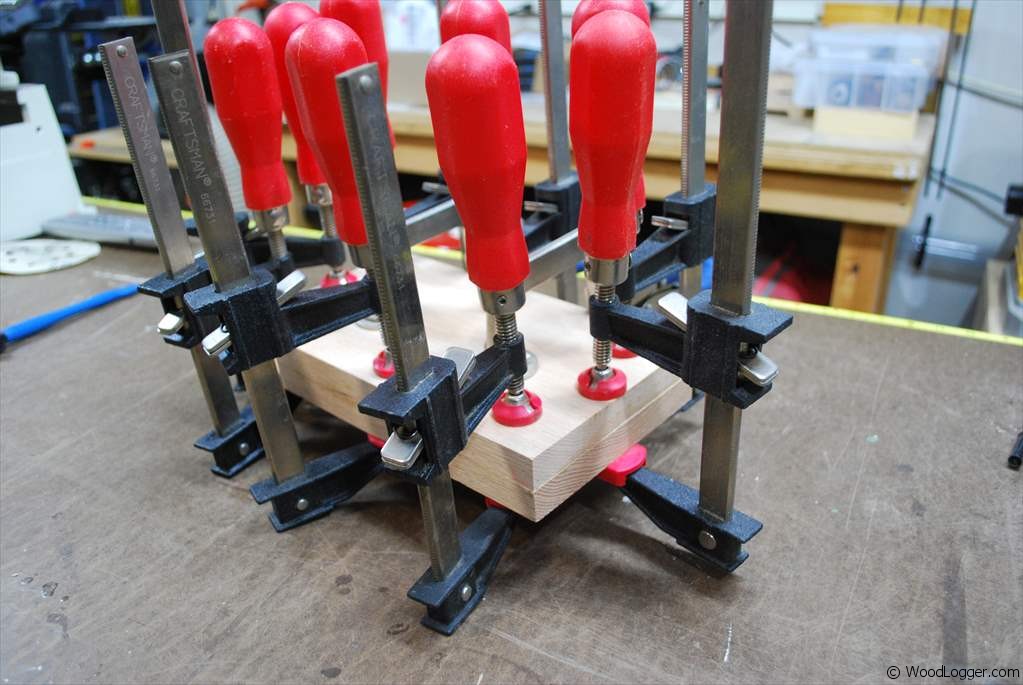 | I glued my 2 boards together to give me a 1-1/2 inch thickness of my boards. I needed to drill into the board approximately 1″ to hold my weather gauges. I suppose I could have purchased a board that was this thick, but making it this way was cheaper. |
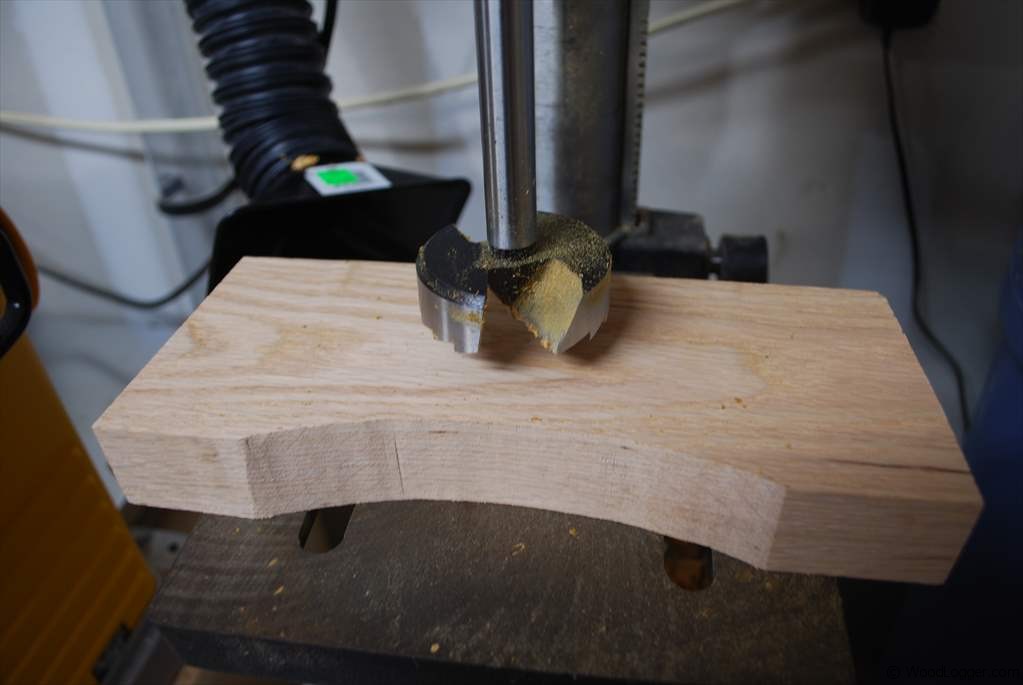
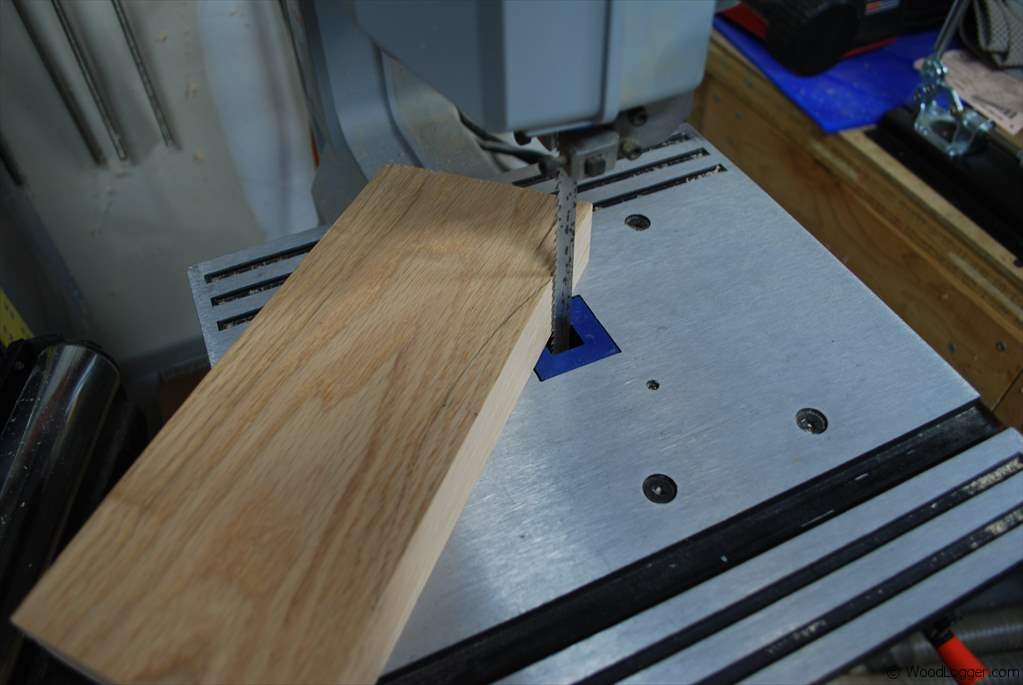 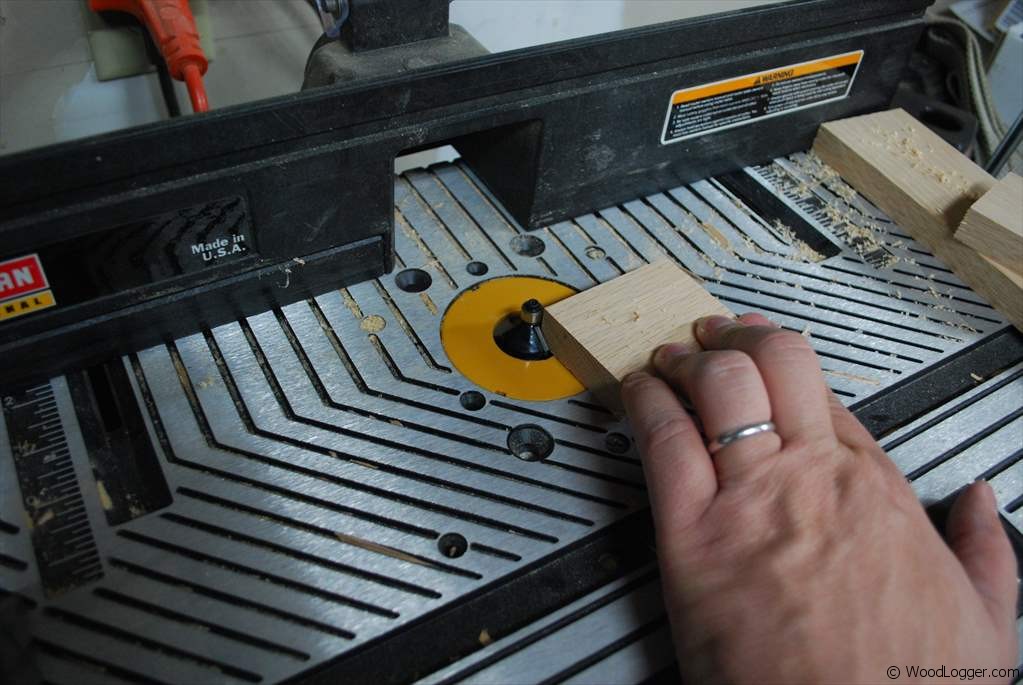 | After my glue up had dried I drew a small arch on the bottom of the board. It was approximately 2″ in from each side and about 5/8″ deep. I actually used a tennis racket to get my arch. You’ll have to watch the video for that one to make any sense. I cut my arch on the band saw and used a chamfer bit around the top and pads. |
 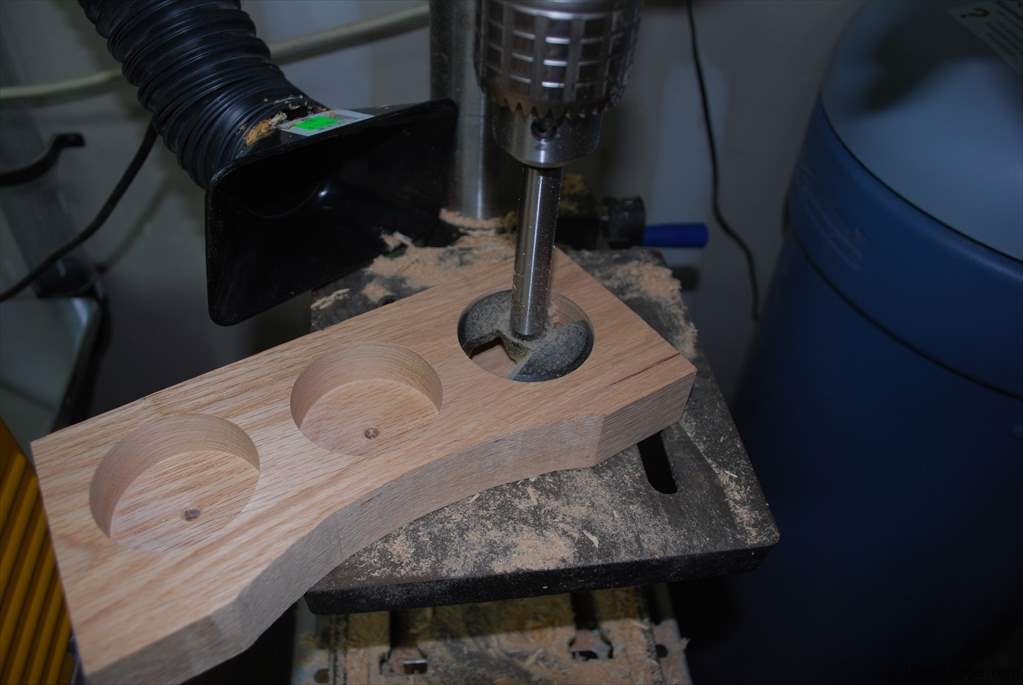 | For the gauges to fit into the weather station I drilled 3 holes using a 2-3/8″ Forstner Bit. I spaced them out evenly and there approximately 3″ apart from each center. As this was Oak and the bit was rather large I set my drill press to the slowest setting I could and then just took my time. I drilled to a depth of 1″. |
 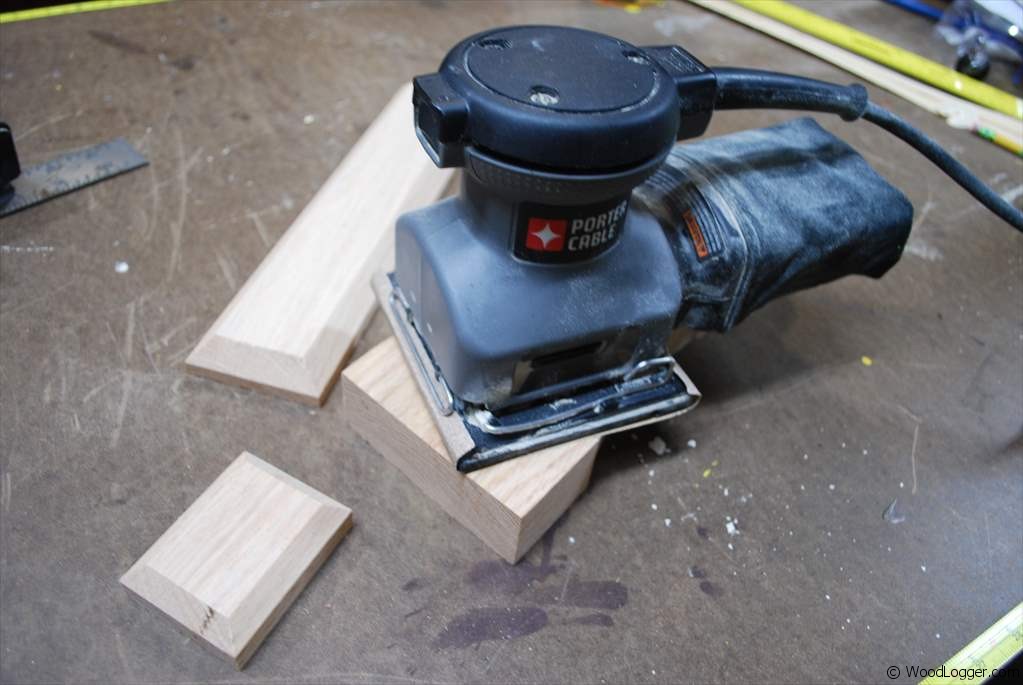 | After all my boards were finished cut I decided to sand them before final assembly. I think sanding smaller projects like this before assembly makes for a happier woodworker. |
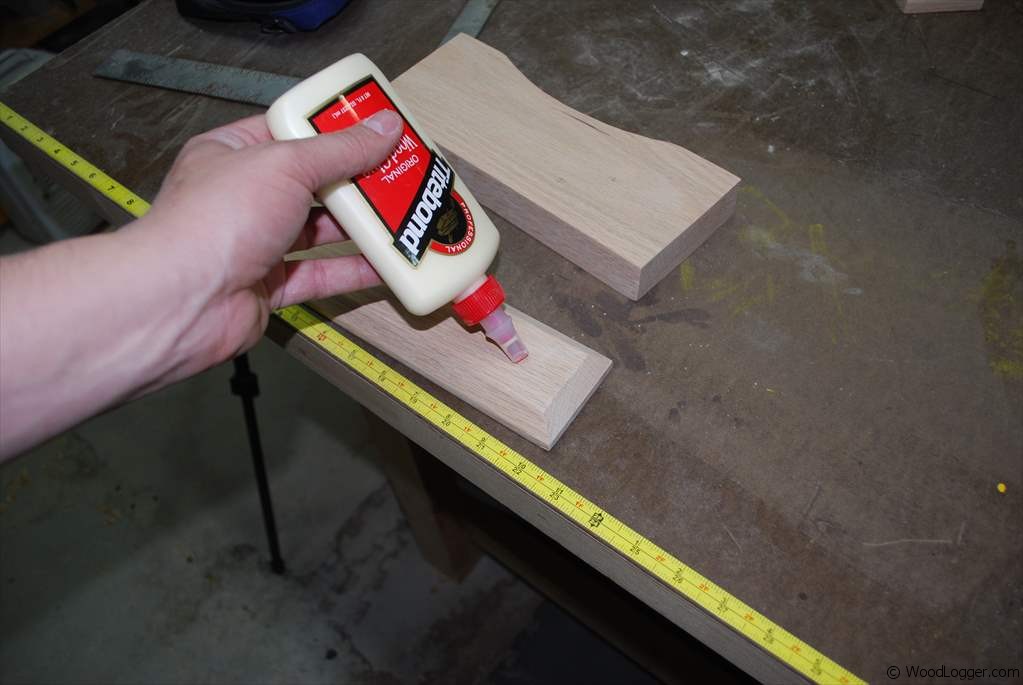 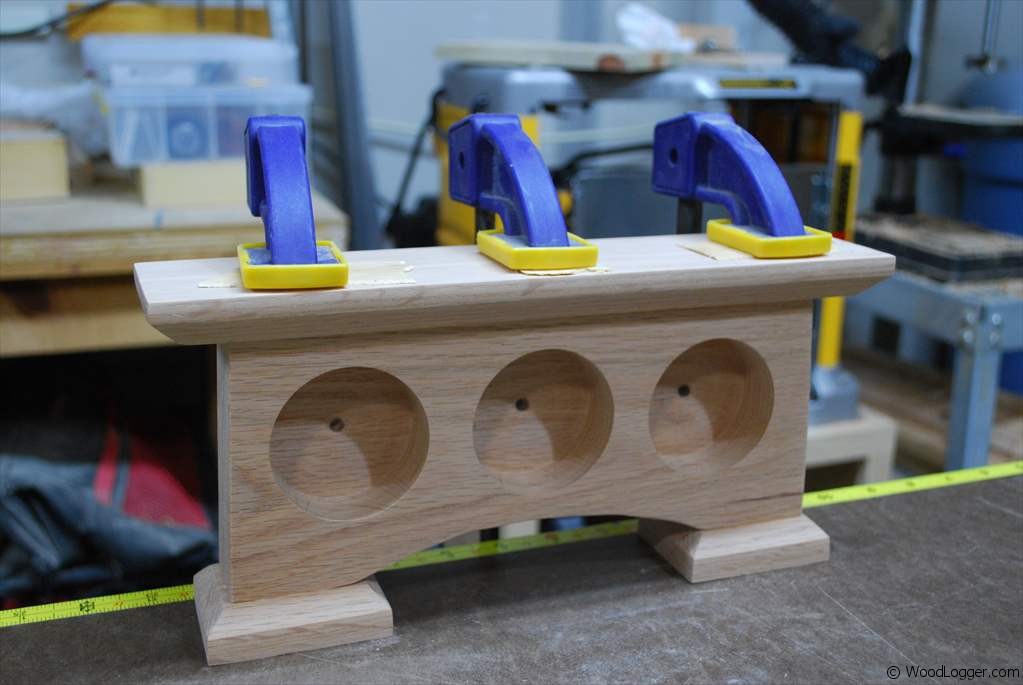 | After sanding was complete I glued up the pads to the bottom and glued up the top. I used a heavy amount glue and spread it evenly across as much surface as I could. After the glue dried, it held together really well. |
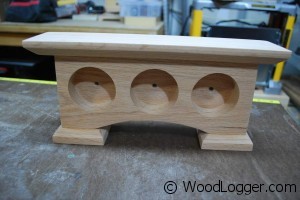 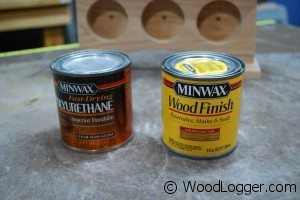 | When it came to finishing the weather station I used a golden oak stain, and a clear semi-gloss sealer. It gave it a very classic look and should be well protected for a long time. |
Items I Used to Finish this