How to Make a Spaghetti Measure
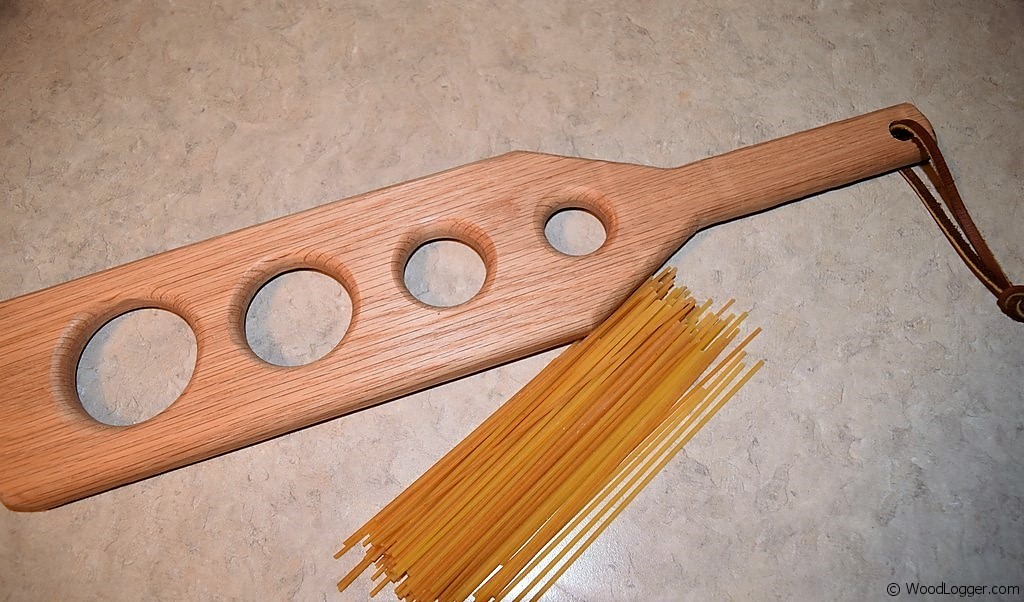
Making a spaghetti measure is a quick and enjoyable woodworking project that’s perfect for woodworkers at any skill level. This handy kitchen tool helps solve the age-old problem of how much spaghetti to cook, by giving you perfectly portioned servings every time. Traditionally, spaghetti measures have holes of different sizes that correspond to one, two, three, or four servings, making it a simple but effective tool for avoiding waste or overcooking.
You can craft one of these in about an hour, and they make thoughtful, unique gifts for friends or family who love to cook. Plus, a handmade spaghetti measure adds a personal, rustic touch to any kitchen.
For those interested in tackling this project, check out the Spaghetti Measure Project Plan I’ve included.
If you make one of these, be sure to share a picture over on the WoodLogger Facebook Page—I’d love to see how yours turns out!
Material List
- (1) 1″ x 4″ x 2′ – oak (or any hardwood)
Milling & Assembly
 | I made my spaghetti measure 15″ long and 3″ wide. You can use any wood you want. Although, a hardwood would probably be best. I chose to make mine out of 1/2″ oak. Although in hindsight I think Walnut would have been pretty nice too. |
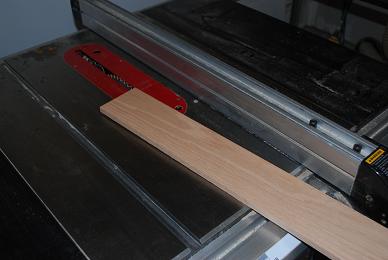
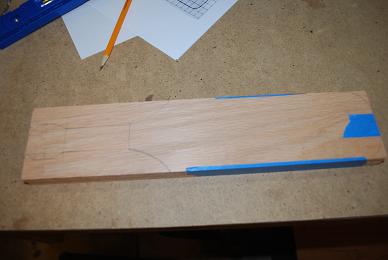 | The board I had was 36″ long and the measure I’m making is only 15″ long. So I was reminded of an old saying, “the only thing better than making a spaghetti measure, is making two spaghetti measures”. (seriously though you can always find a family member who wants one of your projects) I cut my boards to length and taped the two together with masking tape. I then traced out a very simple design to make my measure. It’s a little hard to see in the pic, but I outlined something that looks like a paddle. |
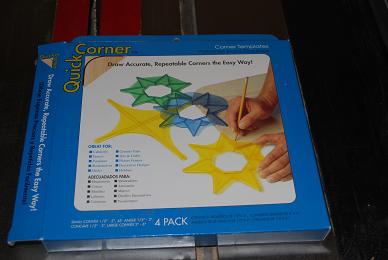 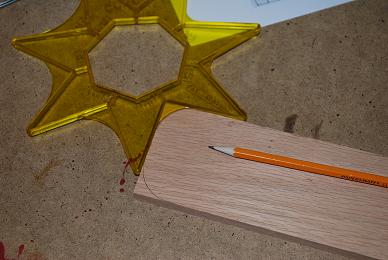 | In order to get my corners on the measure I used one of my favorite marking tools. The quick corner set comes with 4 different marking templates. Each template makes it easy for you to put your board on the template. It’ll give you a perfect every time. I went with a 1/2″ corner for my measure. |
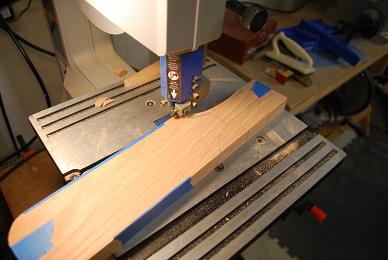 | After I completed tracing out a pattern, I used the band-saw to cut the pattern of my measure. I could have used a scroll saw as well. For the holes I drilled out four holes using various sized bits. Check out the project plan for more details. |
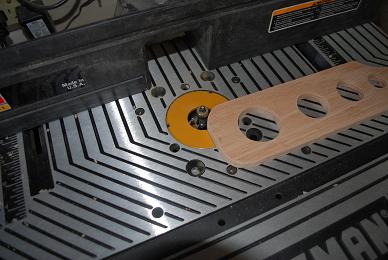 | I used a 1/4″ round over bit on the entire measure. I wasn’t sure how doing a round over on the inside of the serving size holes would turn out, but it was actually really easy. Just hold on to your measure and don’t let it get away from you. |
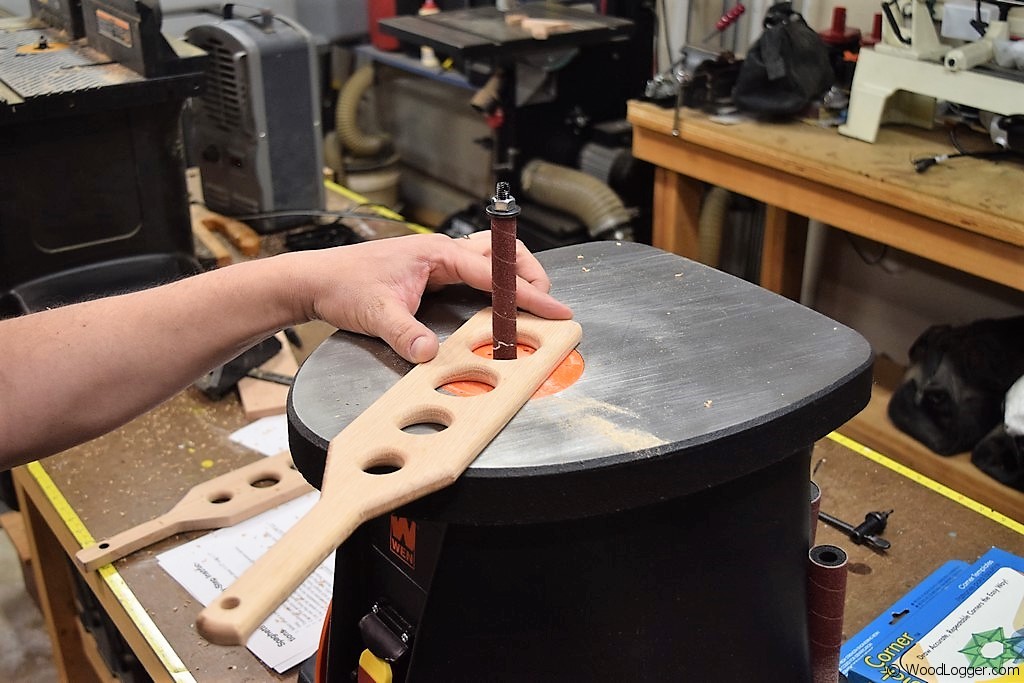 | I cleaned up my spaghetti measure using my WEN Oscillating Spindle Sander. A spindle sander is great for this. If you don’t have one no problem just take a little extra time starting with a heavy grit sand paper and work your way through the grits till you’re ready to finish it. |

The spaghetti measure is nearly complete, but I wanted to give it a proper finish that’s safe for food contact. This was my first time creating an item meant for use with food, so I did some research on food-safe finishes. I settled on Salad Bowl Finish by General Finishes, which is specifically designed for items that come into contact with food. The manufacturer claims that it’s safe to use after drying for 72 hours, and they recommend applying at least three coats for optimal protection.
To be extra cautious, I decided to apply five coats, ensuring a durable and protective layer. Here are a few tips for achieving the best results with food-safe finishes:
- Surface Preparation: Sand the surface thoroughly before applying the finish. Start with a coarse grit and progress to a fine grit for a smooth finish. This helps the finish adhere better.
- Application Technique: Use a clean brush or a lint-free cloth to apply the finish. Work in thin, even coats, and allow each coat to dry completely before applying the next.
- Curing Time: Although the finish may be safe for food after 72 hours, consider letting it cure for a week to ensure it’s fully hardened and to enhance its durability.
- Maintenance: After use, wash the item with warm, soapy water and dry it immediately. Avoid soaking it in water or placing it in the dishwasher to extend its lifespan.
- Reapplication: Over time, the finish may wear off, so periodically reapply a coat to maintain its protective qualities.
Why did you not include the hole sizes to be drilled for the different quantities of spaghetti?
The project is of no use without them…
Dave
Hey Dave, yeah I probably should have explicitly said the drill bit sizes I used. I did put it in a project plan you can find at: https://www.woodlogger.com/wp-content/uploads/2017/03/Spaghetti_Measure.pdf