Turned Seam Ripper

I found this seam ripper kit at woodcraft. They’re incredibly easy to make, and they make awesome gifts. I made this seam ripper for my mom. I’m also going to make another one for my wife. If you have any sewers in your family you should consider making one. I’ll include links at the bottom of this post where you can pick one up. The wood I chose for the handle was padauck wood. It’s an excellent turning wood and looks beautiful when it’s finished. For the finishing I used EEE Ultra-Shine, and a couple of coats of Shella-Wax. The combination of these two products really gave it a beautiful shine and should hold up for years.
If you make one of these be sure to post a picture of it over on the WoodLogger Facebook Page. I’d love to see how yours turns out. (pun intended)
Material List
- (1) Seam Ripper Kit
- (1) 1-1/2″ x 1-1/2″ x 6″ Wood Blank (I used padauck wood)
Milling & Assembly
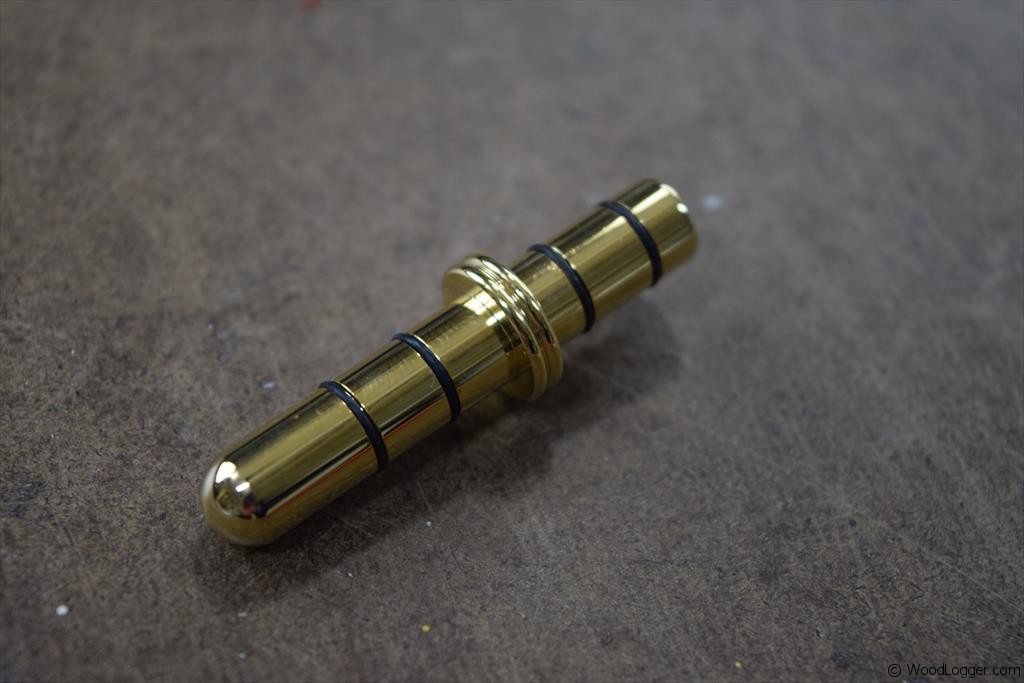
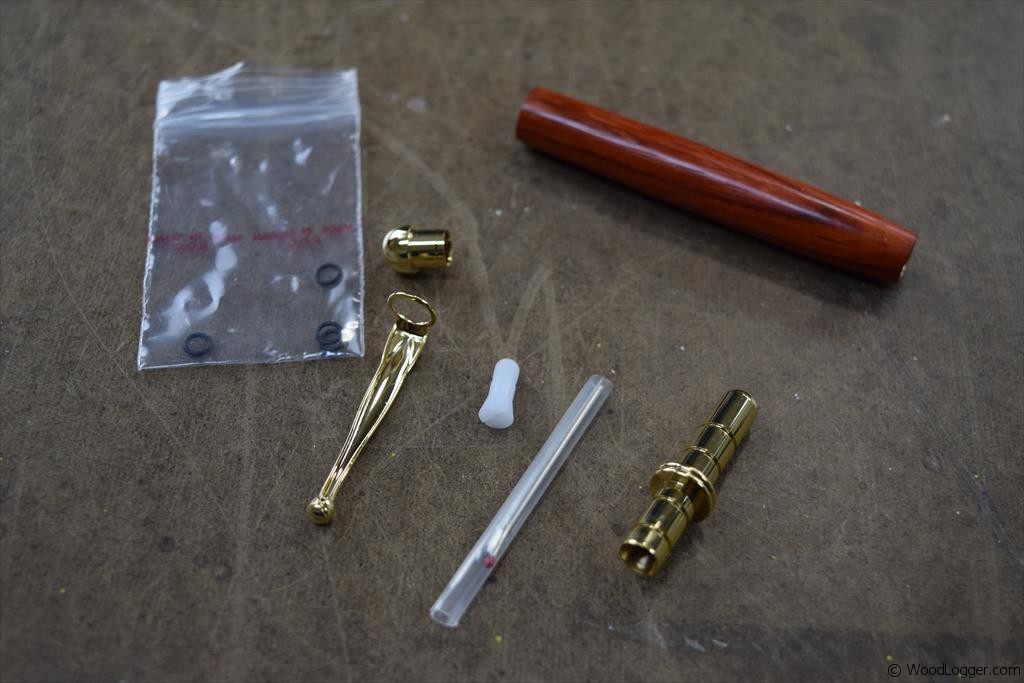 | The seam ripper kit available from WoodCraft has a few basic components. It includes: a brass tube(in this picture it is already inserted in a wood blank), a top and pen clip, four rubber gaskets, blade, blade holder clip, and gold blade handle |
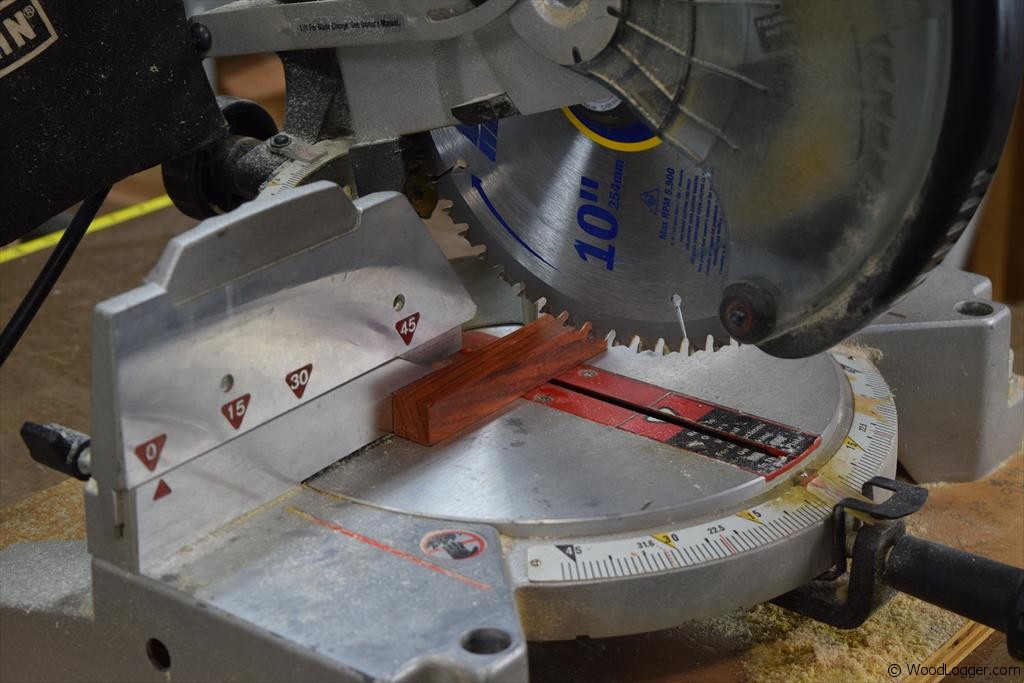 | To get started I chose a wood blank made from padauck wood. It’s a great wood to turn and looks beautiful when it’s finished. I cut this one to a length about 1/4″ longer than the brass tube included in the kit. |
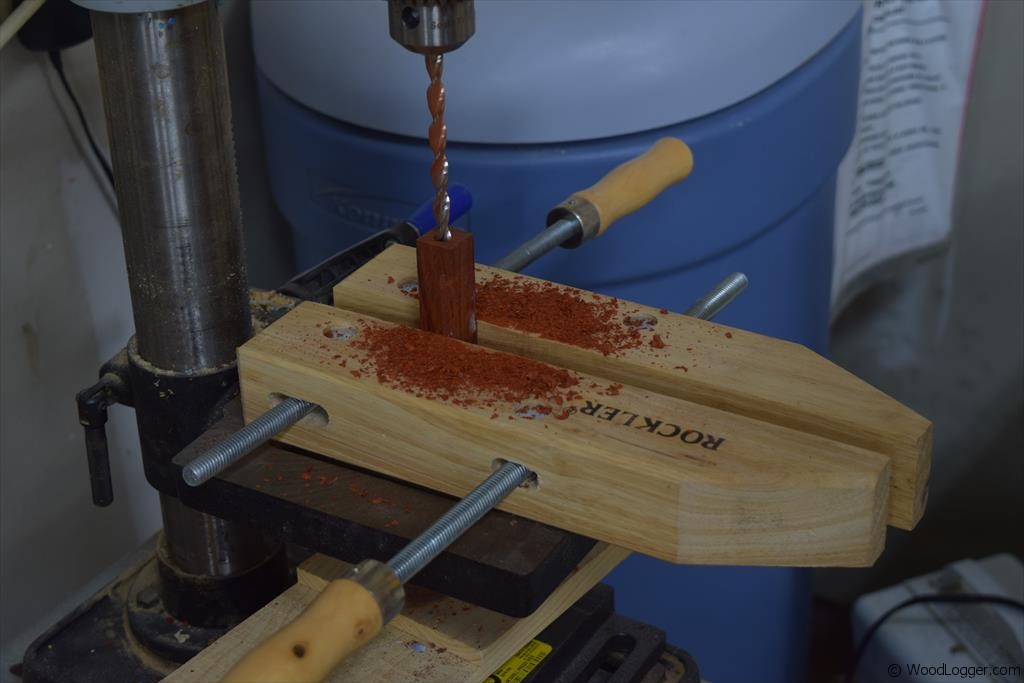 | To create a hole for the brass tube insert. I used a drill bit sized letter “o”. |
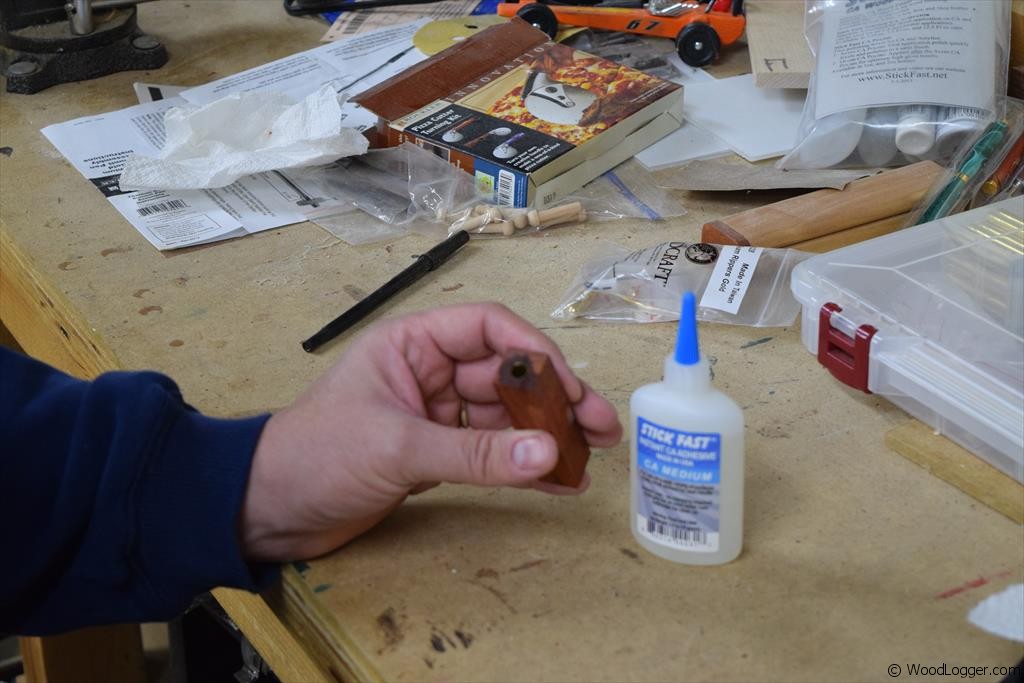 | Before I inserted the brass tube I used sand paper to scratch up the brass tube. This is to help the glue have something to hold onto after it is inserted in the tube. For the glue I used CA glue. It is a quick drying cement and holds up very well. |
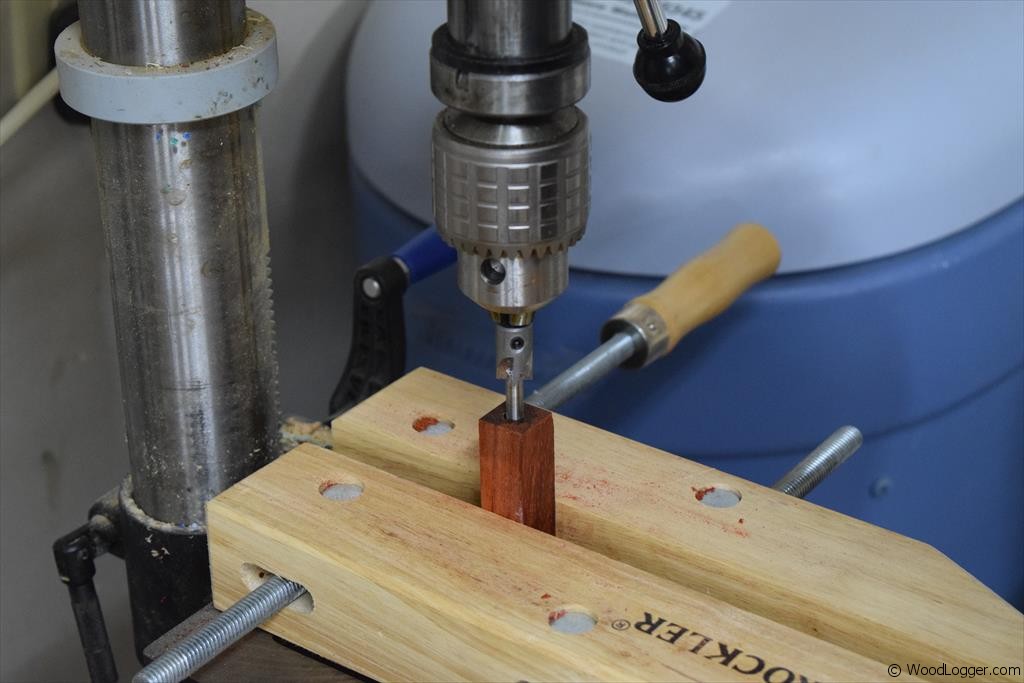 | After gluing up the tube; the next step is to use a barrel trimmer to make the ends flush with the brass tube. This is an important step; if the ends aren’t flush when you go to assemble your kit it’ll look a little strange. |
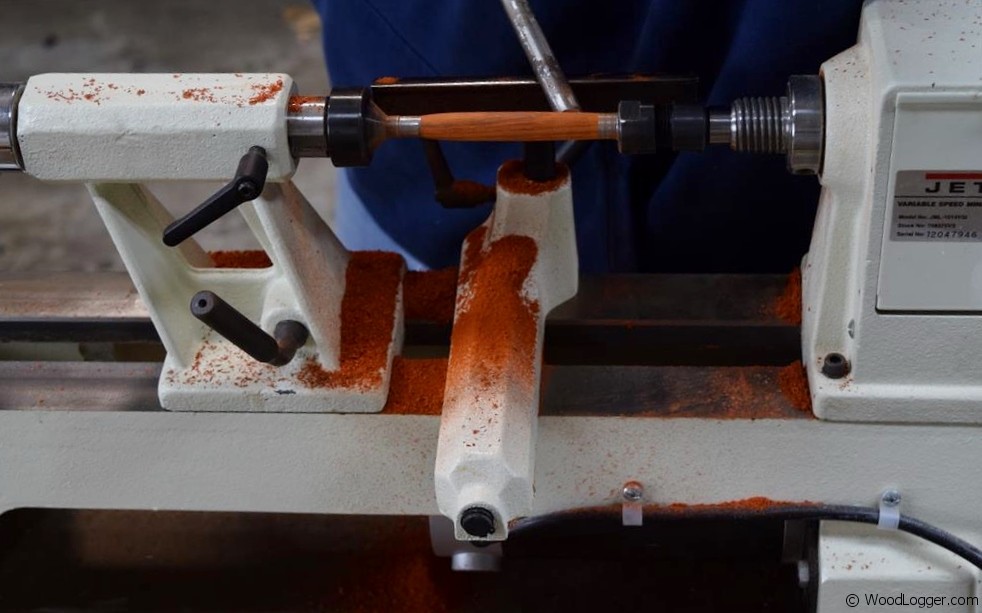 | Next up you’ll want to turn you blank. I chose a very simple profile for mine. This is the fun part of turning blanks as you have an unlimited set of options. I started by using a bowl gouge, and then using a skew. I left a little thickness on the ends so when I sand it up there will be some wood left. |
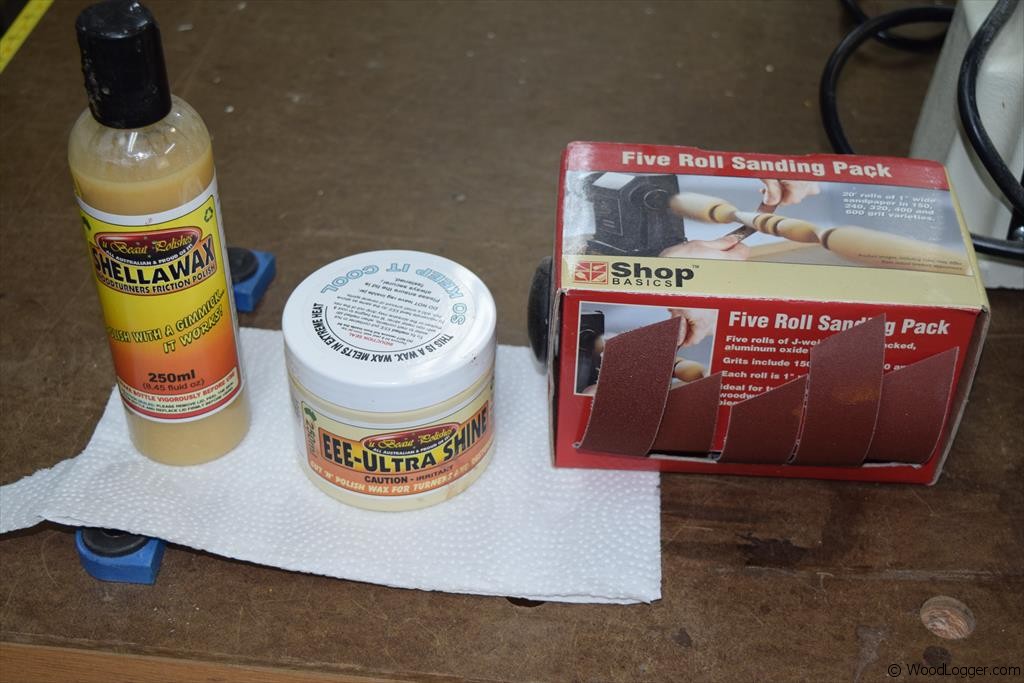 | When it came to finishing my seam ripper. I started by sanding the blank to a 600 grit level. I used a five grit sanding system to help me with that.Next up I applied a few coats of EEE-Ultra Shine. This product is fantastic and works really well. When applying it you’ll apply plenty of pressure so that it melts into the wood.The last step is to use a few drops of Shella-Wax. This is another great wax product, and is applied by using pressure so that the wax heats up. |
 | When it came to assembly the first step was to put on the four rubber gaskets on the blade holder. These gaskets hold the blade holder to the handle and keep it from slipping off. |
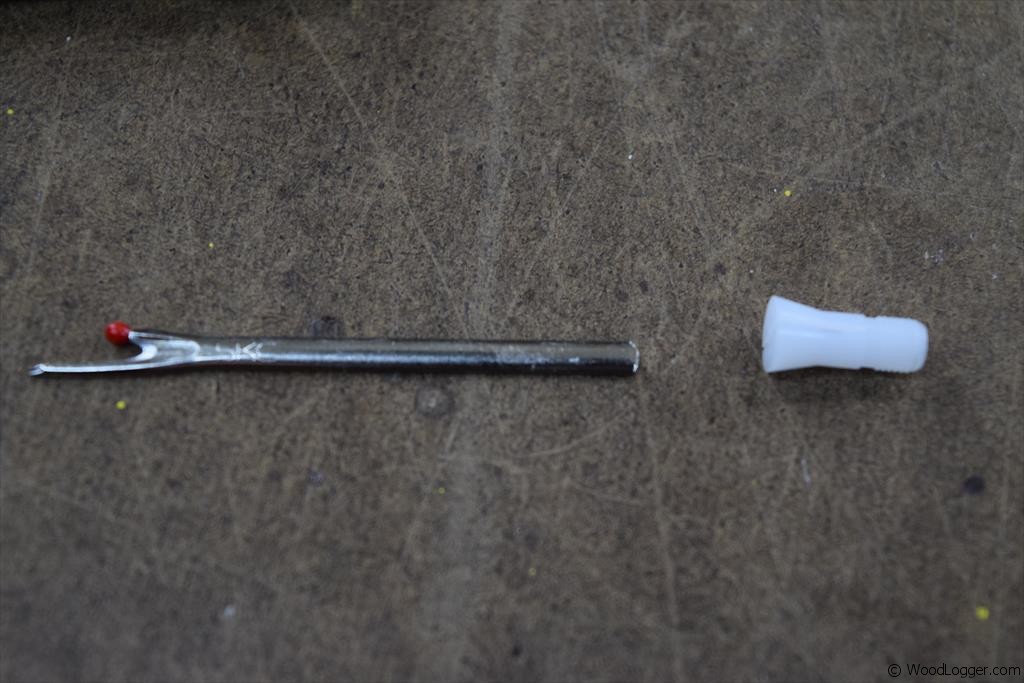 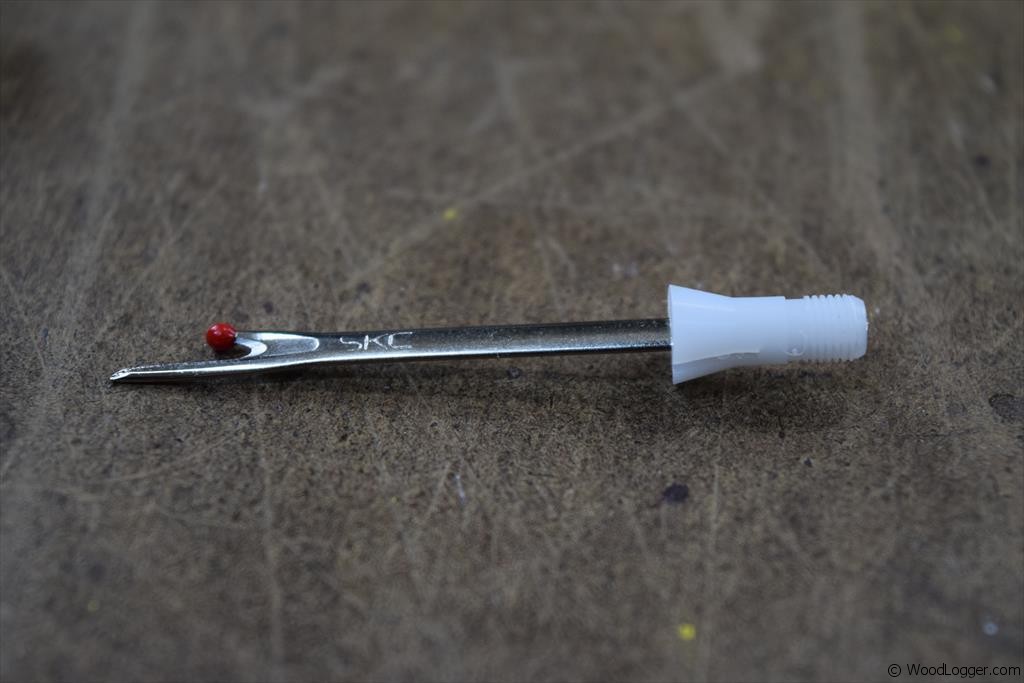  | The kit comes with a blade and plastic blade holder.For assembly I slipped the blade into the holder and then screwed it into the gold blade holder. |
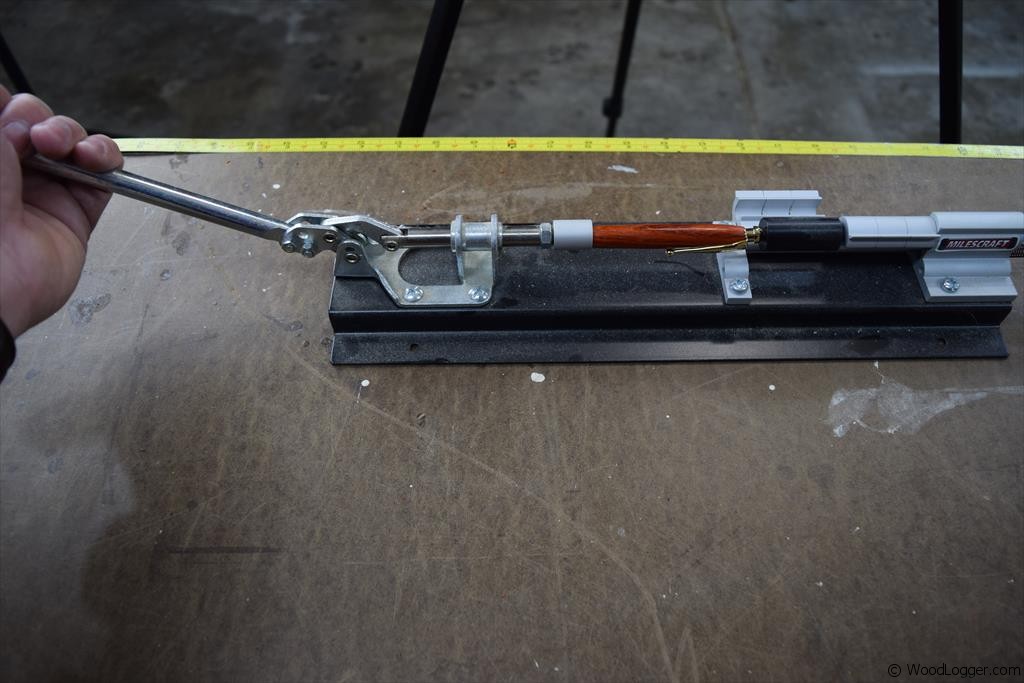 | When inserting the top cap into the blade handle I used a pen press to help out with this. This could probably be done with a vise or something else, but a pen press works really well. |
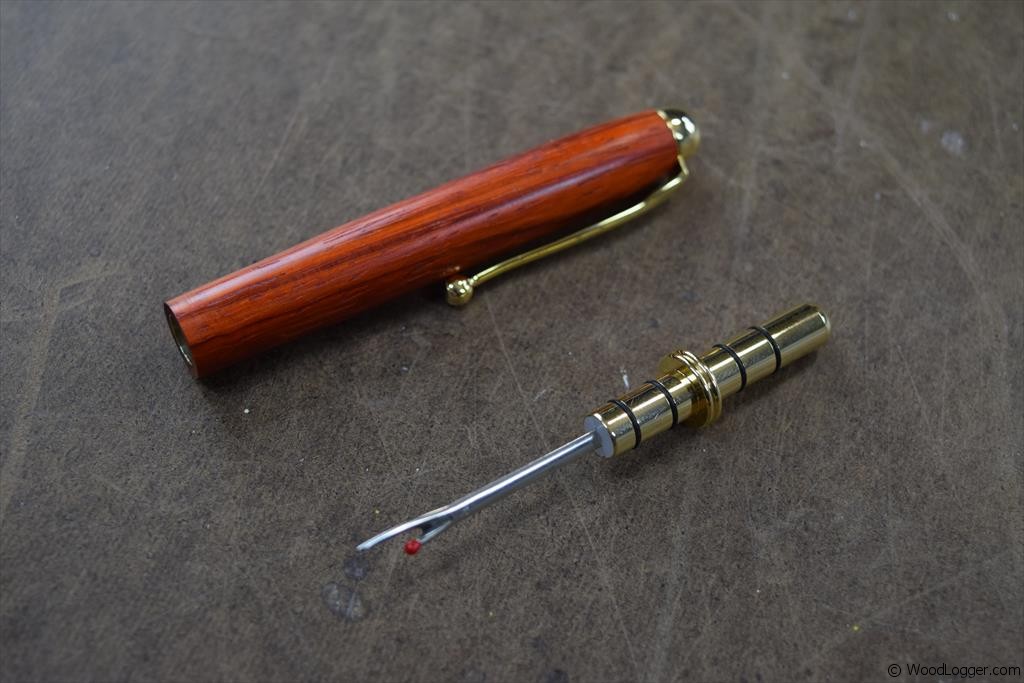 | The end product turned out great. This was an easy and fun project to make and can be made in a just a few hours. |
Items Used to Finish this
Nice. Quick project, and you make it sound so easy! You’re right, that padauck wood came out really nice for this project. Great finish.
Very nice mate. I like most of your woodworking tutorials!