Turned Slimline Pencil
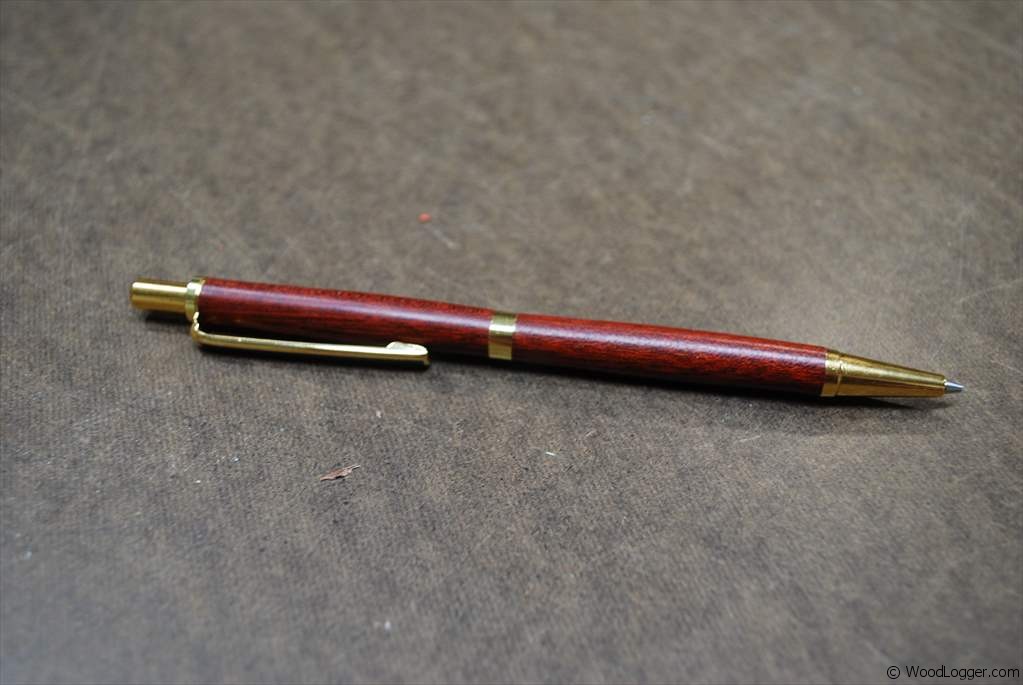
Turning this pencil was a LOT like turning the pen. So much so that I almost didn’t want to write about it. However, I had so many questions emailed to me about the pen and the steps I took during assembly; I decided to go ahead and write about the pen’s partner in crime the pencil. The lathe work is basically identical to what I did for the Slimline Pen. However, the assembly is slightly different. Regardless of the differences it’s a super simple project that can be turned and assembled in minutes. You’ll really get a kick out of having a pen and pencil set when it’s all done. These also make great gifts that anyone would love to receive.
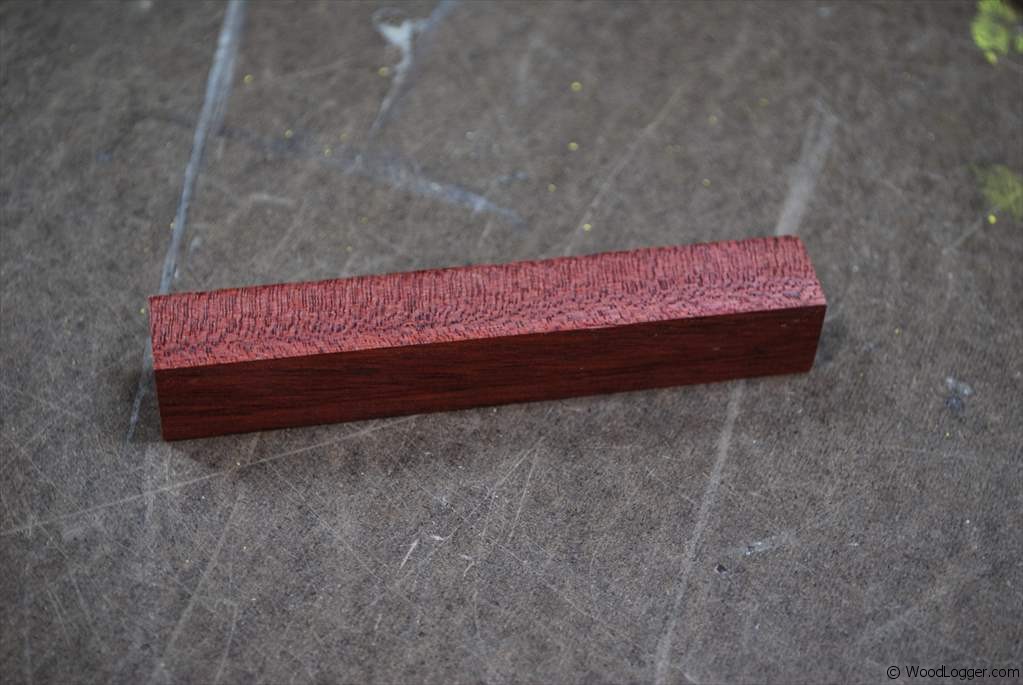
For this pencil I used used paduk wood. It looks very clean and beautiful look to it.
I put links at the bottom of this post where you can find some of the items I used to turn this. I also put together a video of how I made this below.
Materials & Hardware
- (1) SlimLine Pencil Kit
- (1) Pen Blank Paduk
Milling & Assembly
 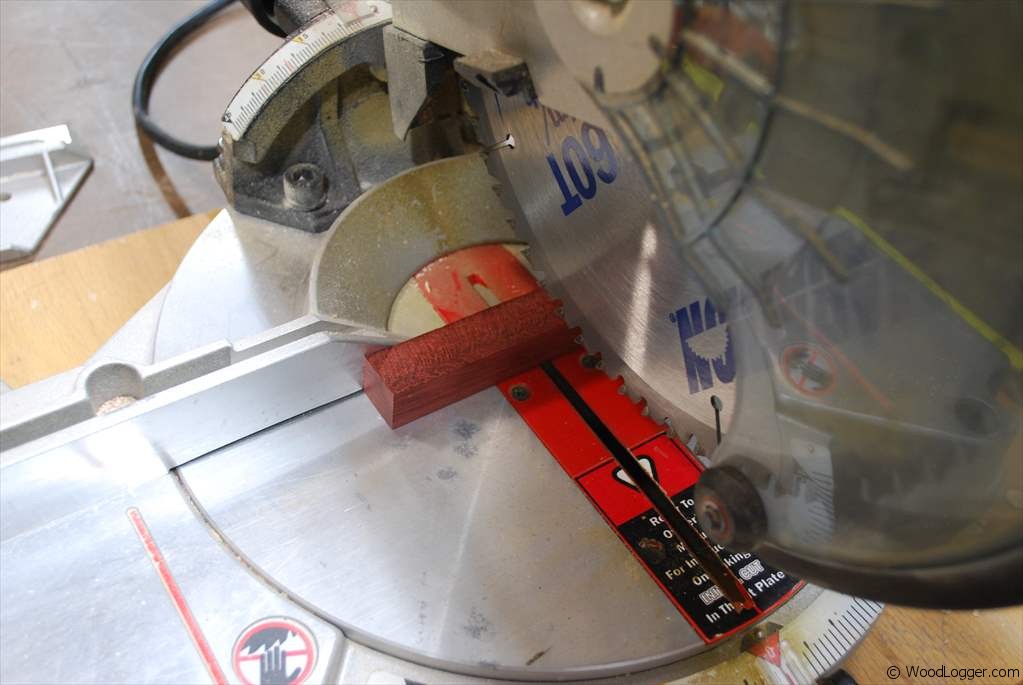 | To start the slimline pencil making process. I start with selecting a wood blank and cutting it so that I have (2) 2-1/8″ pieces. |
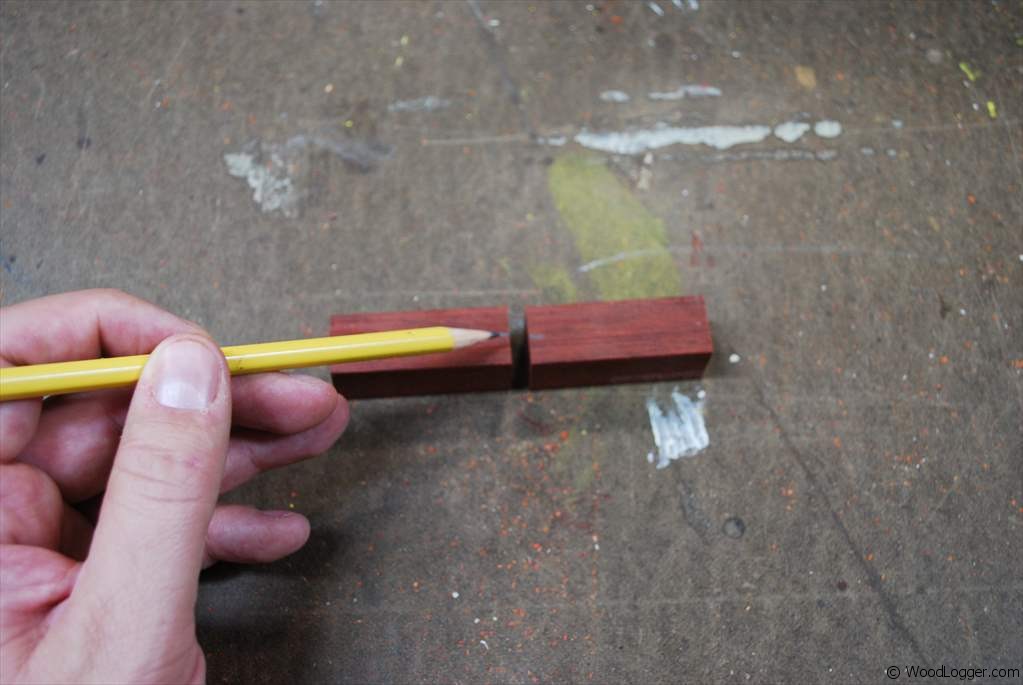 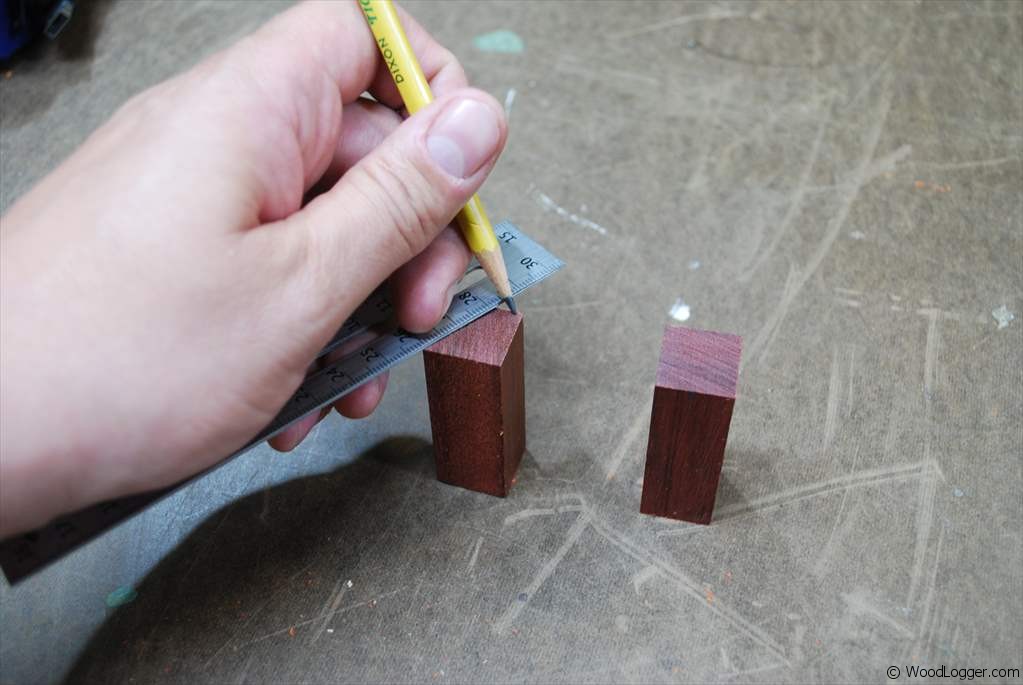 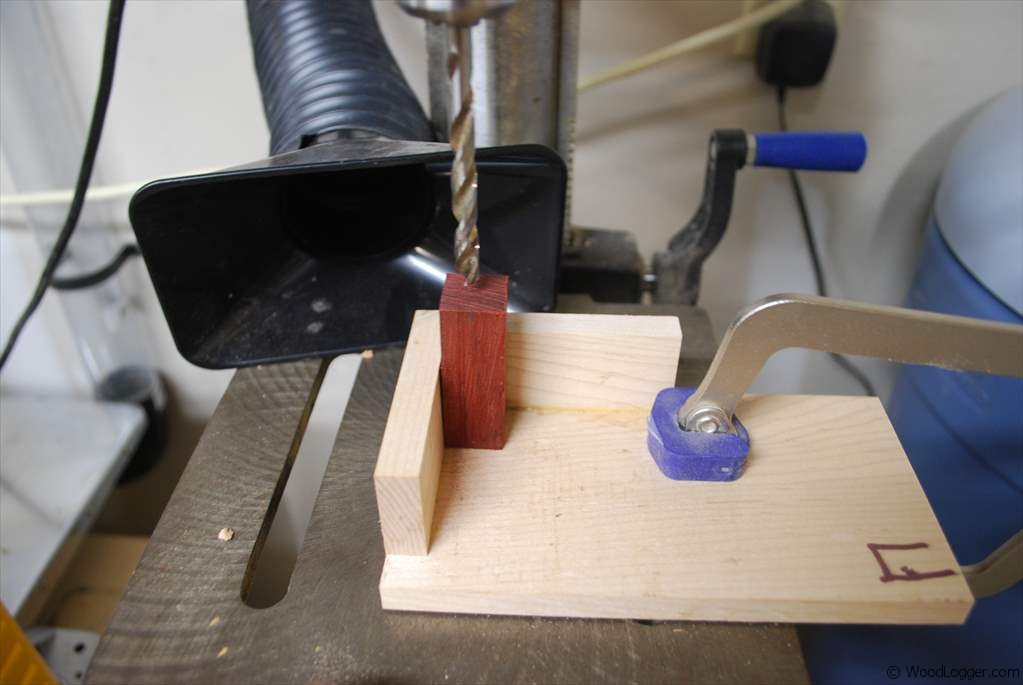 | The next step in the process is to find the center points on one end of each piece. I also like to mark the two pieces so that I can identify the wood grain pattern as I move along the process. After I find my center points then I drill a hole through the blank using my drill press and a 7mm drill bit. This is the size needed for the pencil that I’m making. |
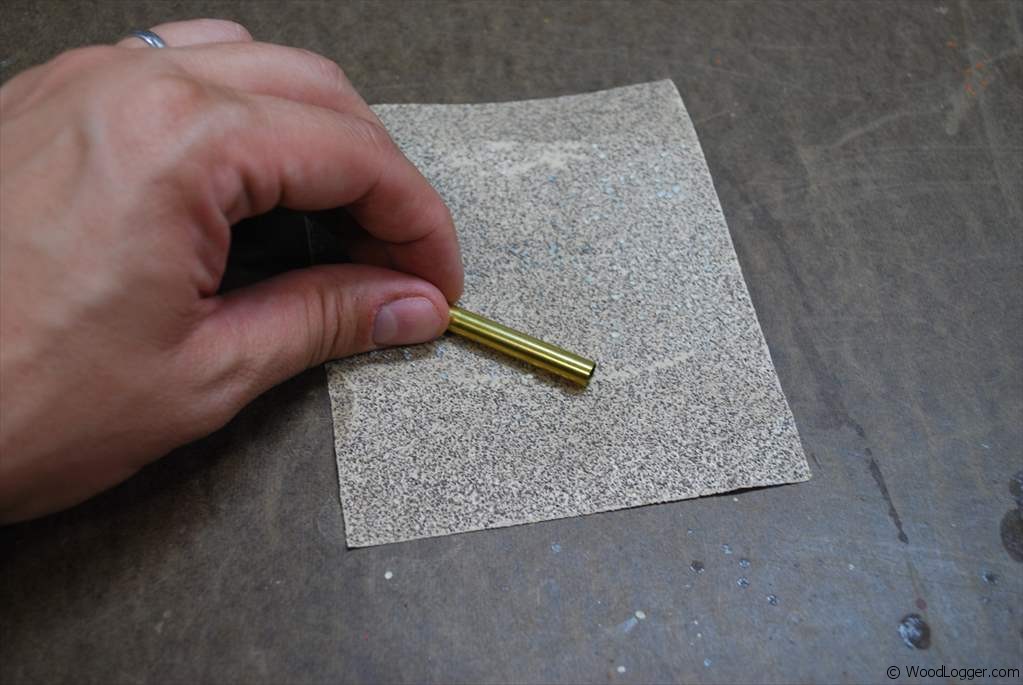 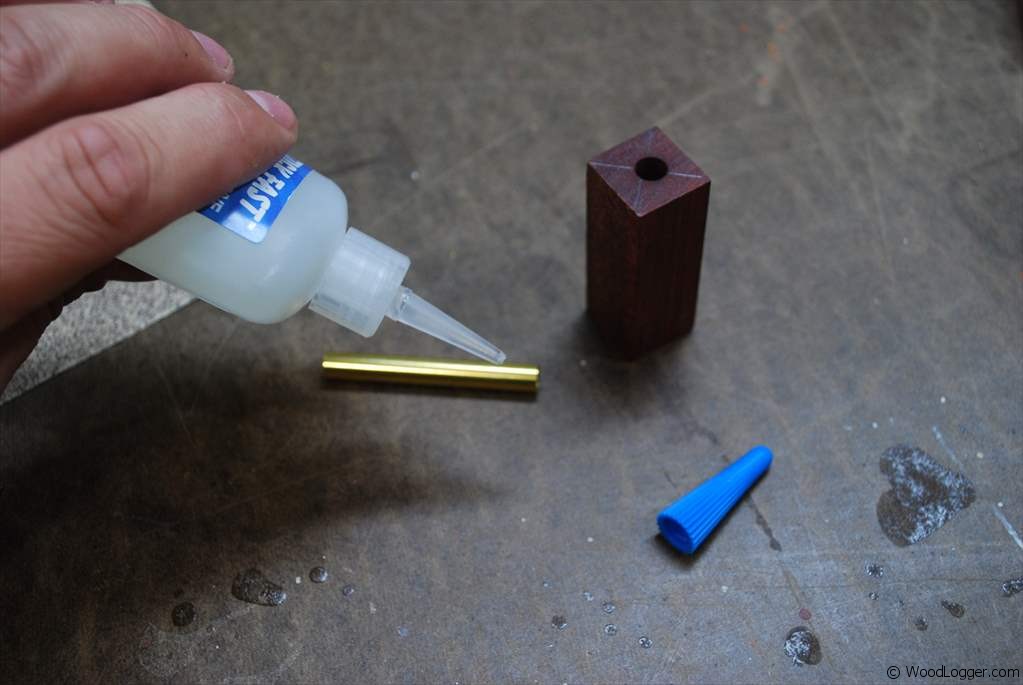 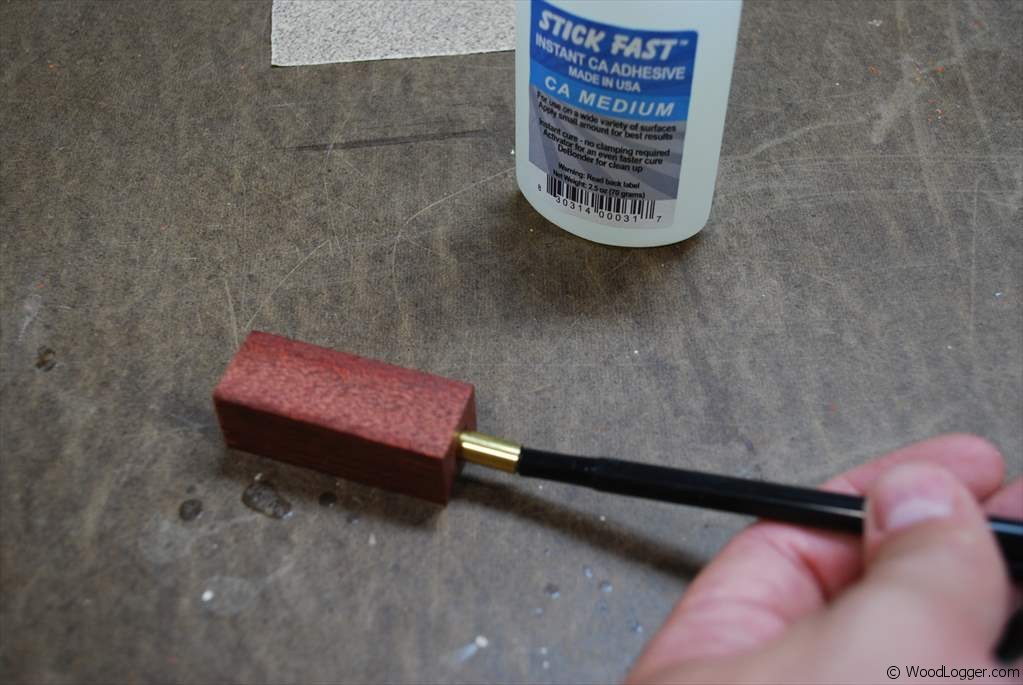  | After I have my holes all cut, the next step is to move on to gluing a brass insert into each piece. I start this by roughing up my brass inserts with sand paper. I used a 60 grit paper. This is so that the glue has something to grip to. The glue I used is a CA glue called stick fast. The name is completely appropriate and it really does stick fast. You’ll need to work quick after applying it. To get the tube into the stock I use the end of a plastic pen to do that. There are special tools available for this, but it’s one of those “nice to have” items. It’s very important that no glue get into the barrel as it would ruin the pencil blank. |
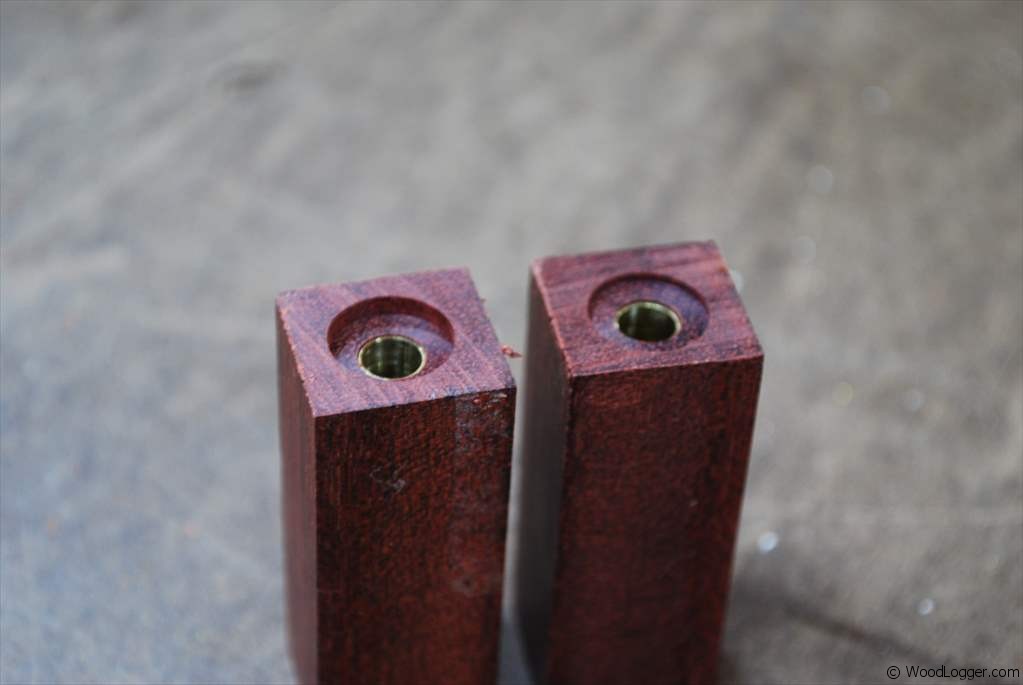
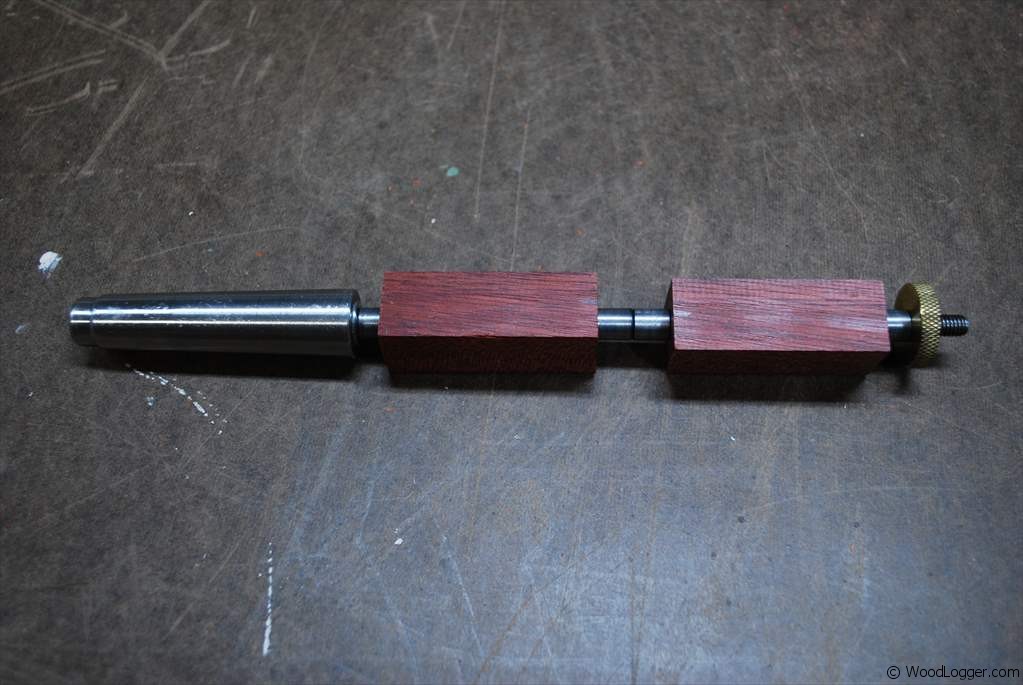 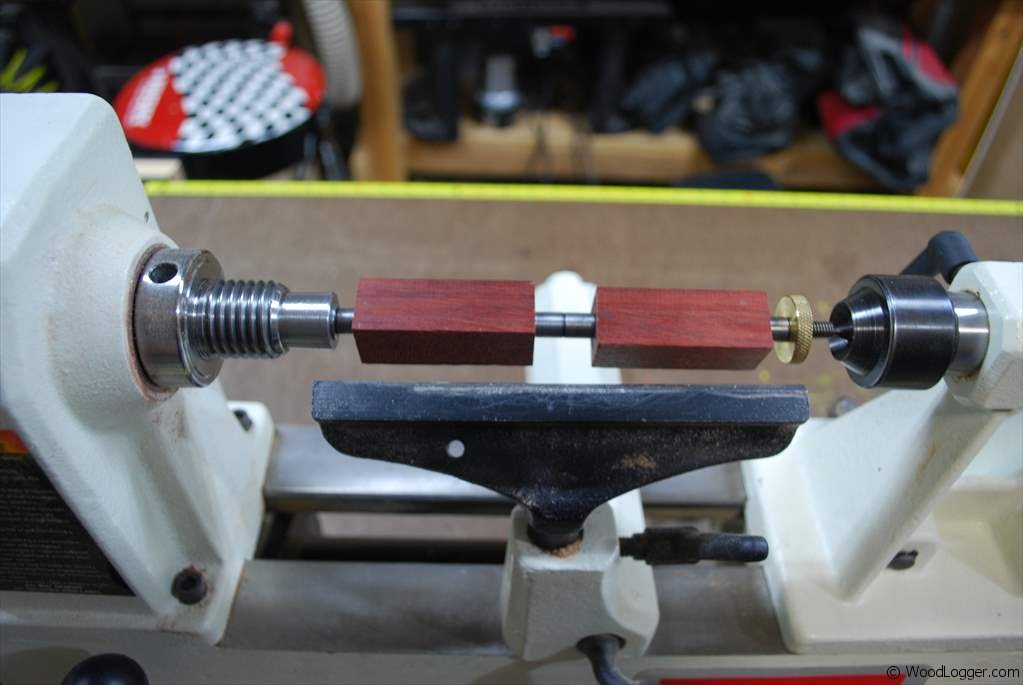 | After I have the brass tubes in my wood blank. The next thing I need to do is true it up the wood on each end. I use a barrel trimmer to do that so it’s flush with the brass tube. After that I load the blanks onto a mandrel(mine is a #2 mandrel) I also use slimline pen guide bushings to separate each end, and then I’m ready to load the mandrel onto the lathe. |
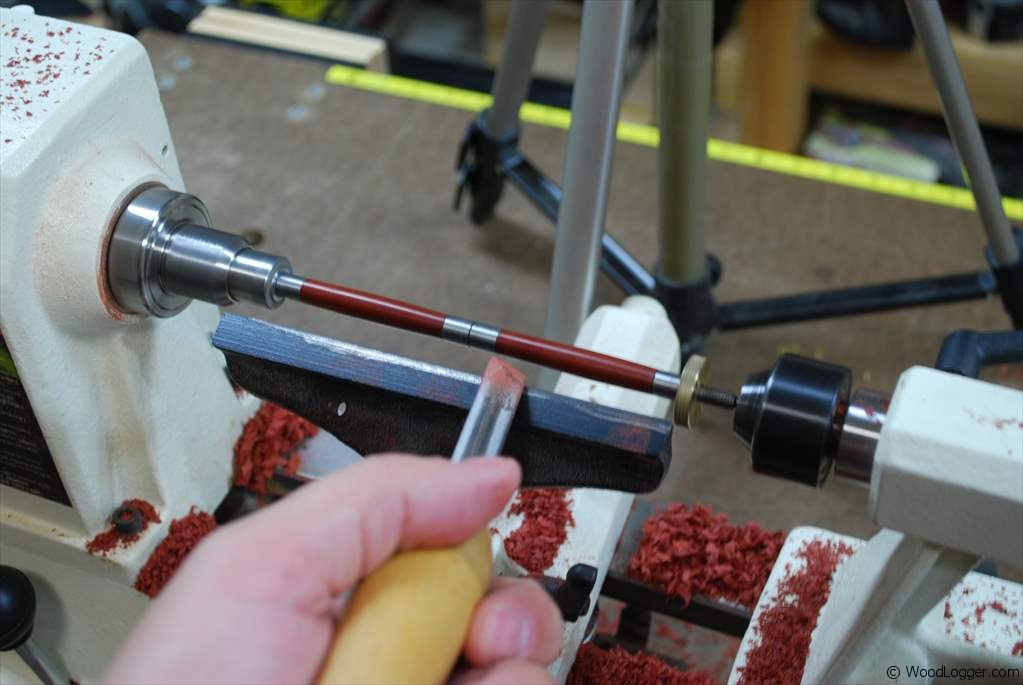  | While turning the blank I start with a small bowl gouge getting the blank roughly the size I want it to be. Then I switch over to a skew. The skew has a much gentler touch to the wood and I use it to smooth the ends of the blanks. After the ends are the same width as the guide bushing the majority of the turning work is done. Next up I start using sand paper to get the blank smoothed out. I start with a 150 grit and work my way up to a 600 grit paper. |
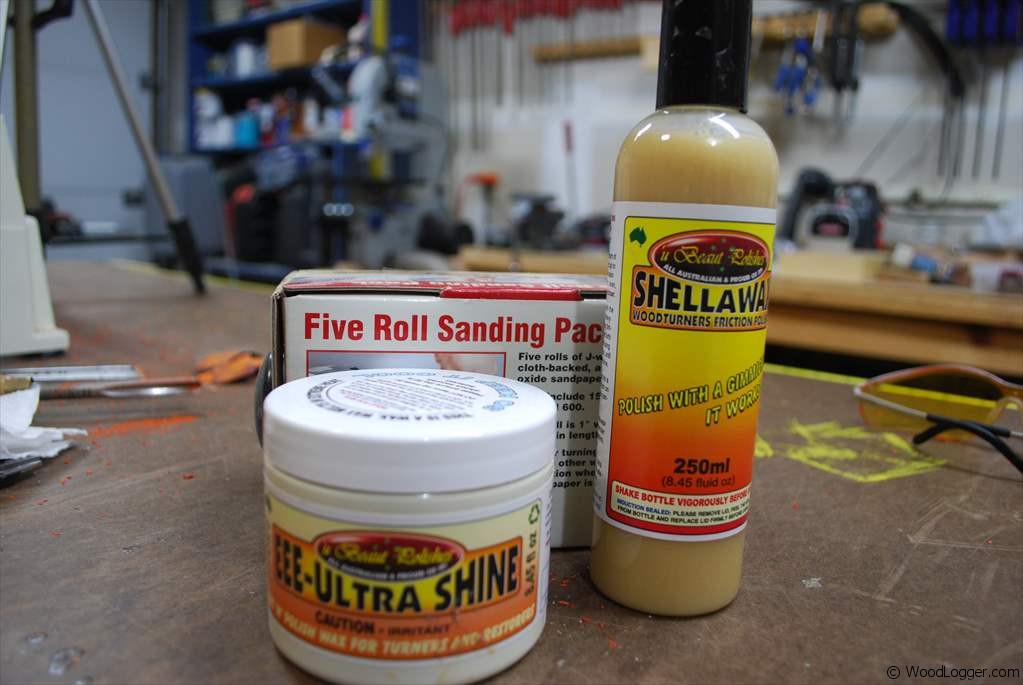 | After sanding is complete then I’m ready to work on waxing the slimline pencil up. The first step in this is to clean off any saw dust from the sanding. Next up I start with a product called EEE-Ultra Shine. It only takes a little and I like to do two coats of this wax buffing off any excess between each coat. After that I use a product called shella wax. When applying this product you only need a drop or two. |
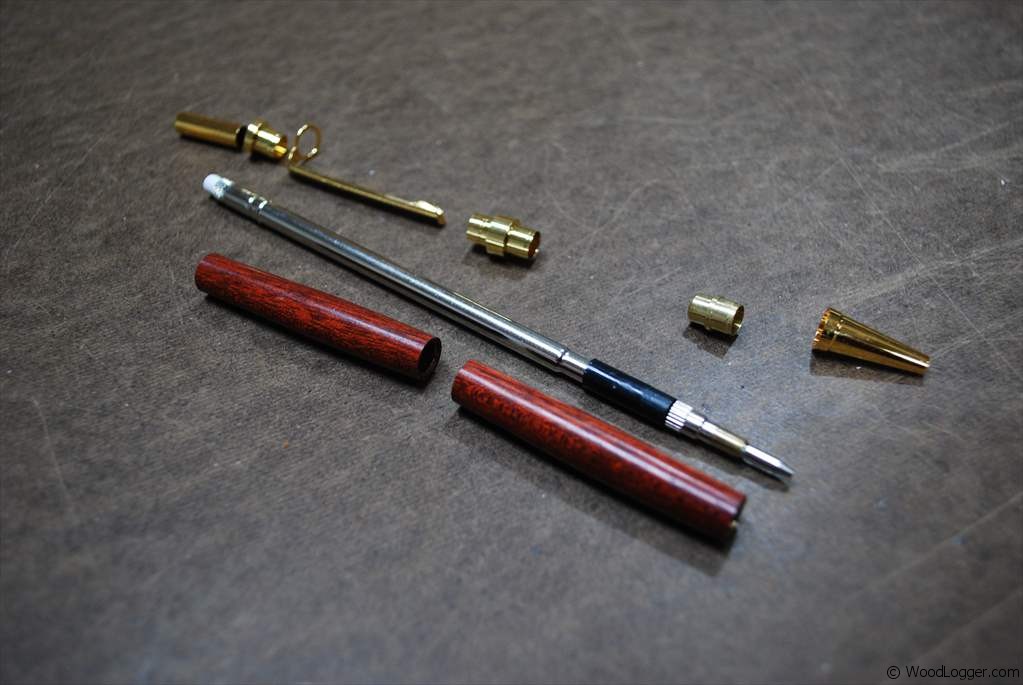 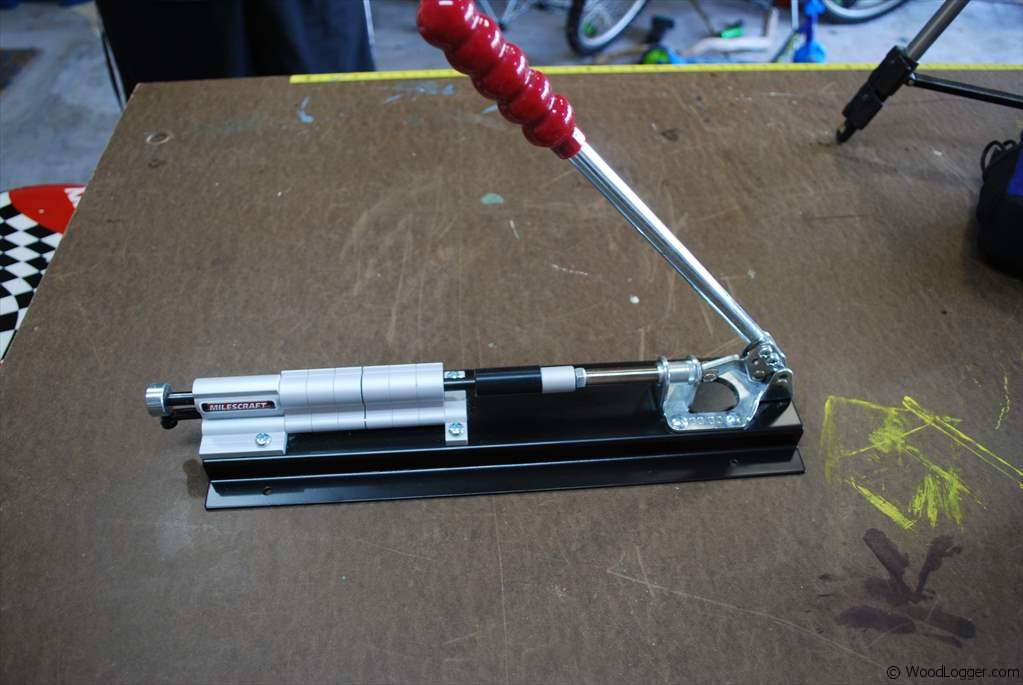 | The last steps in the slimline pencil process are to assemble all the pieces. I used a pen press to help with this. You could certainly get away with using clamps strategically, but the pen press is a big plus. The pencil kit includes directions on the process, but the basic process is to insert the tip and mechanical pieces into the brass tubes. It’s a simple thing to complete. |
Items I Used to Finish this
email address for slim line pencil please